How To Parkerize Steel
Parkerizing: Applying an anti-corrosion and lubricating phosphatized surface treatment
Parkerizing is an electrochemical process that creates a protective iron-phosphate layer on the outer surface of steel. It protects the steel from corrosion and also increases its resistance to wear. The resulting surface is irregular on a microscopic scale. This produces a grey matte finish that holds water-repelling lubricant. The overall result of protection against oxidation and wear makes parkerizing superior to bluing for protecting guns.
First, some warnings
This is not the way to parkerize steel, but it is one way to do it. It might work for you. In the process, you might somehow manage to avoid burning down your house and poisoning yourself, your family, and your kittens. But I doubt it. Done correctly, this can still be downright dangerous. Don't try this at home.
Finally, I'm no metal-treating guru. I just helped a friend do this and I took the pictures.
OK, that should be adequate lawyer repellent...
Now for some background
Of course those are cases and not bullets. Cats are notorious for their poor grasp of technical terminology, not to mention their typing and English grammar....
Parkerizing is an electrochemical method of protecting steel from corrosion and it also increases resistance to wear. That's electrochemical as in chemical reactions which take place in a solution at the interface of an electron conductor (a metal or a semiconductor) and an ionic conductor (the electrolyte), and which involve electron transfer between the electrode and the electrolyte or species in solution. It does not mean that electrodes and wires are involved at all!
Parkerizing is the creation of an iron-phosphate layer on the outer surface of the steel, producing a grey matte finish that helps to protect from corrosion and increases wear resistance.
The protection is in two parts. First, the iron-phosphate layer itself is protective. Second, the surface is bead blasted before the parkerizing chemical bath, producing a surface that is irregular on a microscopic scale. This irregular surface is somewhat porous so it better holds lubricant.
There are several related techniques, but generally they involve a phosphoric acid (H3PO4) solution with key ingredients of zinc or manganese, with varying amounts of nitrates, chlorates, and copper, the solution being heated to 88-99°C, close to the boiling point. So, instead of the boiling lye of bluing, parkerizing uses boiling acid. It's nasty at the opposite end of the pH scale.
Different metal salts in the solution produce different colors of non-reflective finish:
| Zinc | Light to medium grey | |
| Manganese | Light to dark grey, or black | |
| Iron | Dark grey to black |
Military Handbook
Phosphate and Black Oxide
Coating of Ferrous Metals
Phosphating can interact with a coating of cosmoline over
a period of years to produce a light greenish-grey color.
I know that this sounds like an odd thing to mention,
but the elusive green tint is the Holy Grail of the
Garand restoration community
because it is what is seen in WWII-era M1 Garands
that were subsequently stored packed in cosmoline.
My server logs show that a lot of people who find this
page through Google were searching for something like
green parkerizing
Some people try soaking parts in various combinations of lubricants in seach of the green shade. Usually it involves cosmoline, but also different cutting oils, axle grease, and so on. See this ODCMP forum page for some discussion of this.
On To The Project
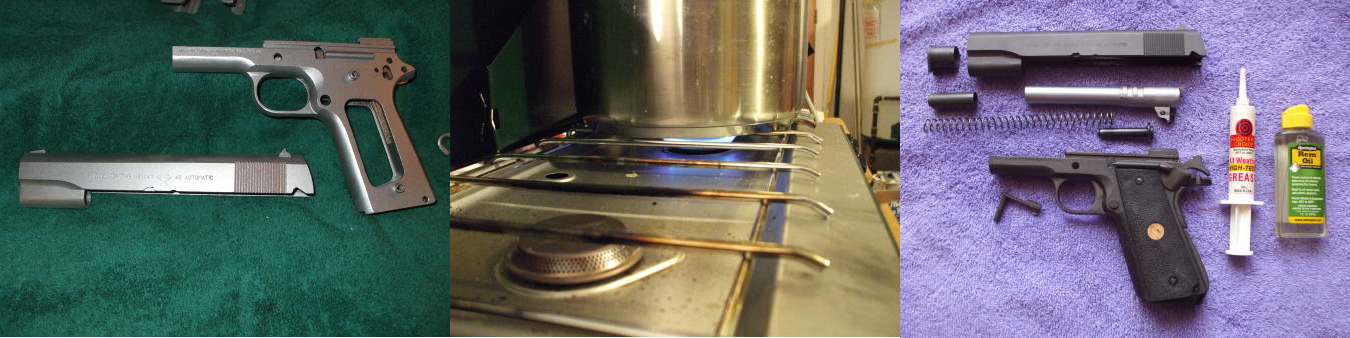
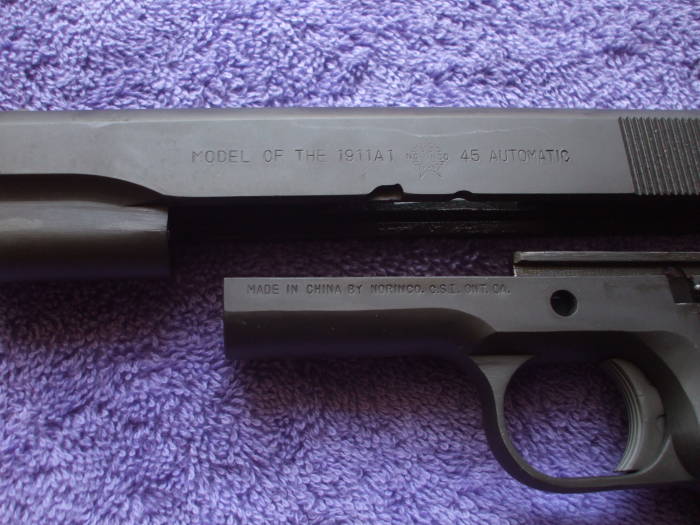
Norinco corporation applies a nearly black and sometimes uneven bluing to their products, like this M1911A1 slide. The finish was unevenly blued and nearly black, and it seemed to be optimized for the collection and display of fingerprints. Having seen some nice parkerized finishes, my goal was to remove the bluing and parkerize it.
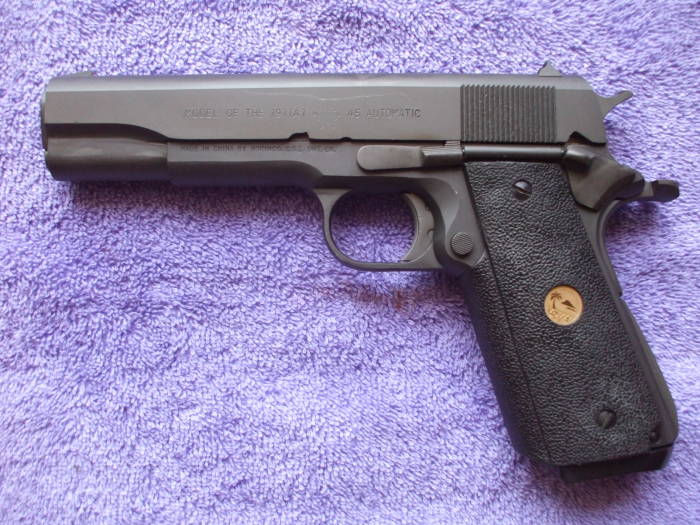
The first picture shows the frame in its original finish — nearly black.
Another page shows how to remove bluing with vinegar, click here to see that process.
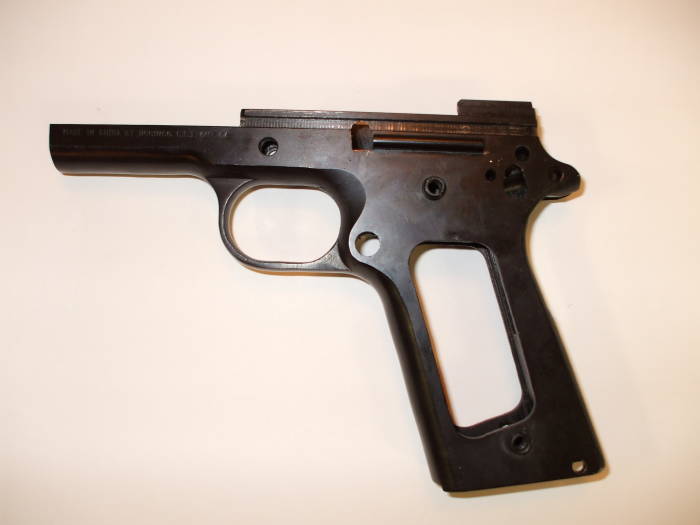
Norinco M1911A1 pistol frame, in original blued finish.
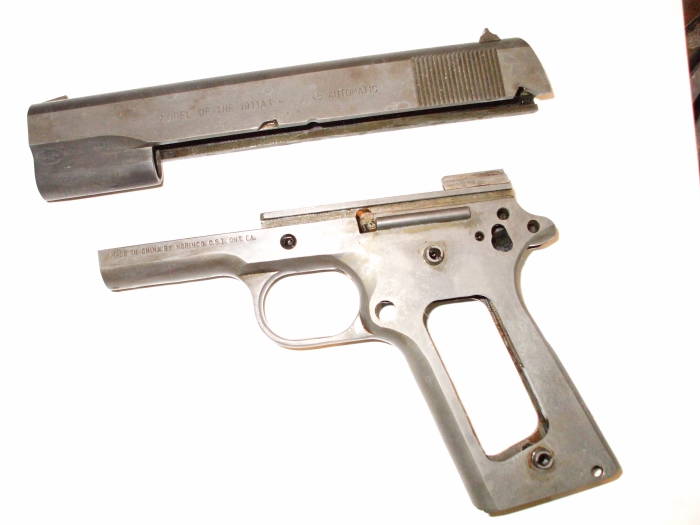
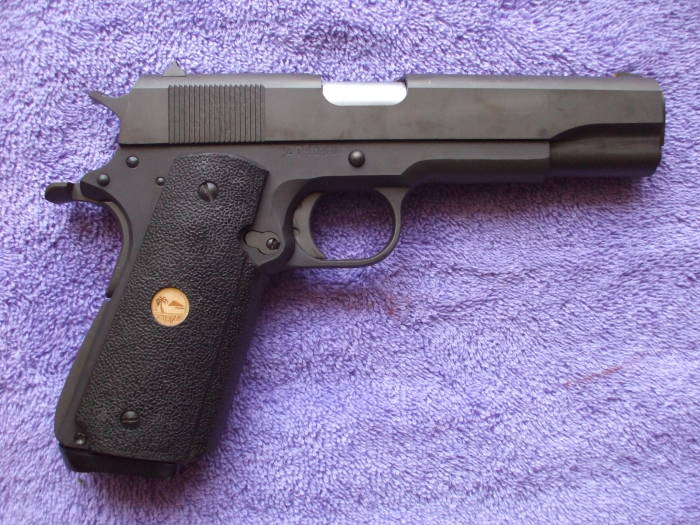
The original blued finish has been removed in preparation for parkerizing.
Here are the slide and the frame after the end of the debluing process. The parts were rubbed with extra-fine steel wool and lightly oiled.
Time to move on to the parkerizing!
There was a delay between the removal of the bluing and the parkerizing — the parts were lightly oiled for storage between these steps. But as described below, all oil must be removed before parkerizing.
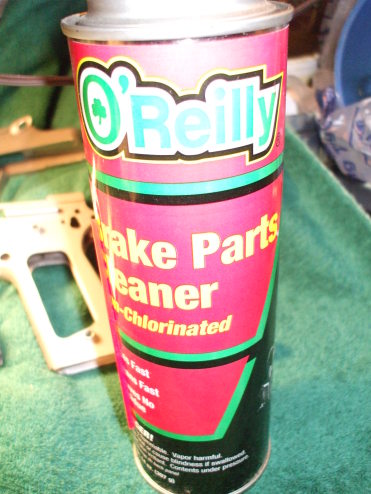
All oils must be removed before the parts are dipped in the parkerizing solution. Brake cleaner can do the job. Here begins the section that must be done "in a well-ventilated space".
Brake cleaner is basically an aerosol spray of hydrocarbon solvents. Acetone, methyl-ethyl-ketone, and so on. This can says "non-chlorinated", but chlorination is about the only organic chemistry not contained in this spray can.
Be careful to always use non-chlorinated parts cleaner spray! Chlorinated sprays can produce deadly poison gas.
Do not eat.
Do not apply directly to forehead.
Do not use while smoking a hookah.
Spray the parts down, and then handle them only in ways that will not transfer any skin oil to the metal.
You could do this in some more complicated way. Clean cotton gloves over rubber gloves, and so on.
However, we found that we could just handle the parts using paper towels that had been sprayed with brake cleaner.
Brake cleaner: Cheap and effective!
The parts must be carefully bead-blasted. The guy who bead-blasted this did a very nice job.
Thoroughly clean the parts with brake cleaner after the bead blasting. Some skin oil probably got transferred to the parts, and brake cleaner is cheap and easy to use.
That is an old 100% cotton towel. I would be very careful to only use 100% cotton towels. Spraying the organic solvents of brake cleaner onto synthetic fibers might result in a real mess!
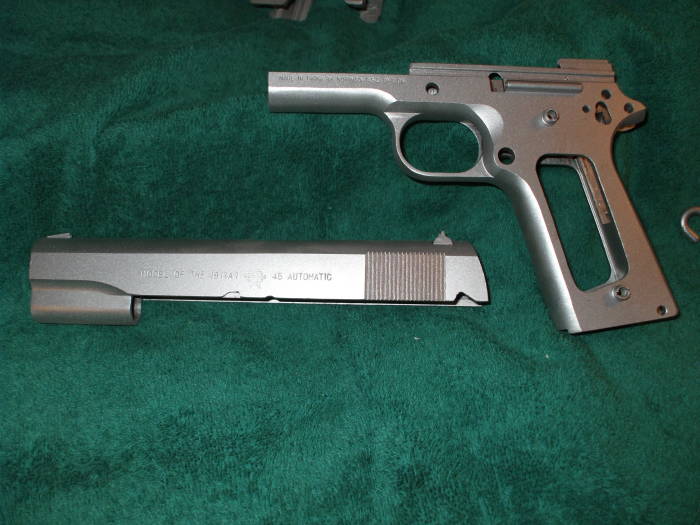
Bead blasted pistol frame and slide, ready for parkerizing.
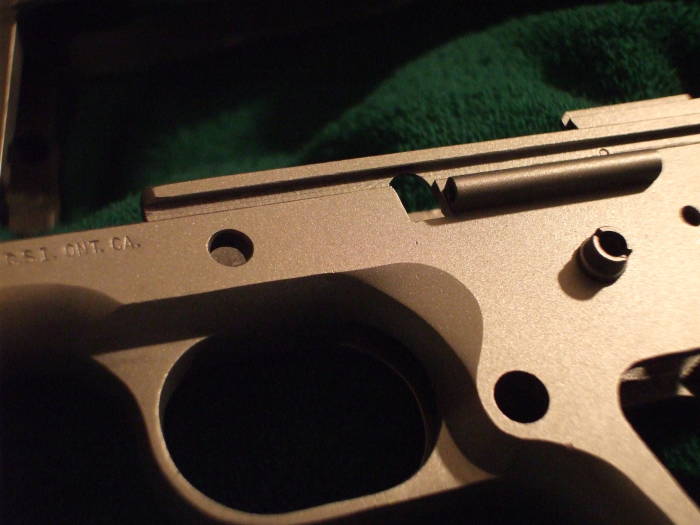
Close-up view of bead blasted surface.
Amazon B00JF8T9TG
The result is a very light colored surface, nearly colorless. The de-blued steel was grey, probably due to some surface oxidation. I would describe the bead-blasted color as silver. The bead blasting has also given it a matte rather than a polished finish. The matte surface finish is probably the reason for the perceived color transition from grey to silver.
It is a dull matte grey, as opposed to a shiny silver mirror finish, because the bead blasting has made the surface irregular on a microscopic scale. The tiny pits capture oil, and their dense spacing along with the oil's surface tension means that the entire surface should be protected by a very thin film of oil.
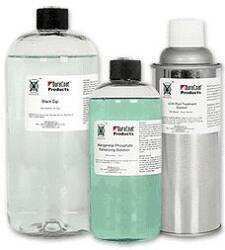
We used Brownells parkerizing solution.
It's a mixture of phosphoric acid (H3PO4) and nitric acid (HNO3), with manganese salts in solution.
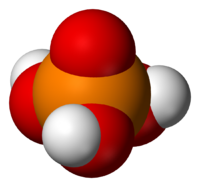
Phosphoric acid, H3PO4
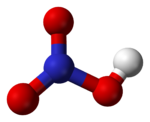
Nitric acid, HNO3
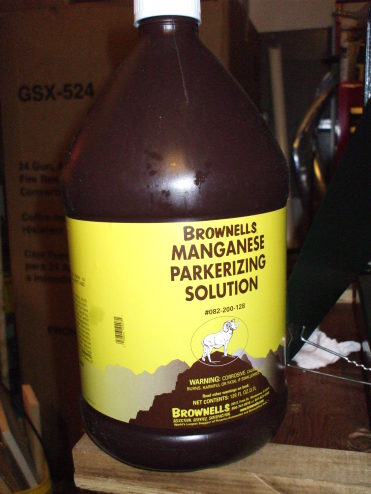
Brownell's manganese parkerizing solution.
A gel containing phosphoric acid is what is called naval jelly, a thick gel that can be applied to surfaces to remove rust. Phosphoric acid is also a component of soft drinks leading to lowered bone density. It is also used in dentistry and orthodontics as an etching solution to clean and roughen enamel surfaces of teeth. I am not making this up.
Nitric acid was first synthesized around 800 CE by the Arab (or maybe Persian) chemist Jabir ibn Hayyari. Not that you really need to know this to parkerize steel, it's just a shout-out to the Arab and Persian scientists who gave us so much of chemistry (alcohol is an Arabic word), mathematics (algebra is also Arabic, while algorithm is based on a Persian name), early cryptanalysis, and so on.
The Brownells solution is used after being diluted with water in a 1:8 acid:water ratio.
Remember your chemistry lab safety,
start with the water:
Do as you oughta,
Add acid to water.

Muhammed al-Khwarizmi, whose name is the origin of the word algorithm.
Extremely important:
Use a stainless steel pot for the process!
Or a cast-iron pot that will become parkerized
on the inside the first time it's used.
Heat the parkerizing solution. We're doing this on a camp stove in a garage.
Also important:
A reasonably well-ventilated work area.
You are about to heat an acid solution to near the
boiling point, and this produces some nasty vapors.
Since the brake cleaner also needs ventilation, you're probably doing this in the same area you where you were cleaning the parts. However, do not have your brake cleaner anywhere near your open flame!
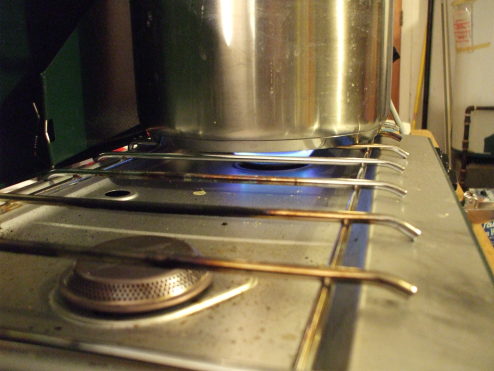
Carefully heating the parkerizing solution on a camp stove.
We aimed for a temperature of 170-180°F / 77-82°C, at least in the sequence shown on this page.
Different temperatures produce different surface finish colors. The finish also varies with the mixture of acids and metal salts.
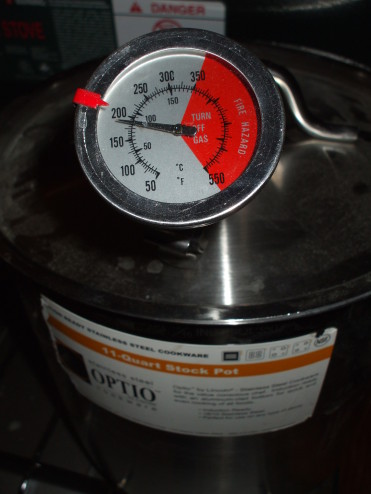
We heated the parkerizing solution to 170-180°F or 77-82°C.
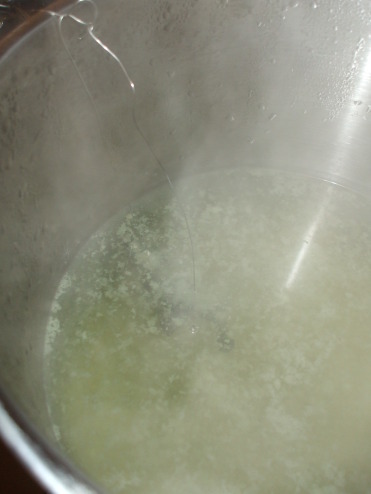
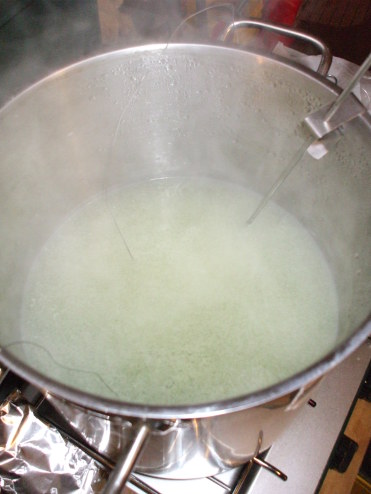
The acid/manganese solution is a fairly colorless and clear solution, it looks like slightly greenish water.
It starts fizzing as soon as you immerse steel. Very fine bubbles come off all the steel surfaces. The solution turns a more distinct green color.
You also get some flakes in suspension in the fluid. It looks like tiny scraps of paper, as if you had accidentally dropped some tissue paper into the solution.
We strung stainless steel wire through as many parts as possible so we could more easily remove them when the fizzing, reflecting the electrochemical reaction, stopped.
Parts disappear into the parkerizing solution.
Vigorously fizzing parkerizing solution.
Larger parts like the slide and frame led to more vigorous fizzing.
All parts were finished after about 6 to 7 minutes at 170-180°F / 77-82°C.
Here is a video recorded during a different session. We lowered the small parts into the solution using a stainless steel ladle with three 1/8" holes drilled near its center.
The solution started fizzing almost as soon as the parts are submerged, you can clearly see this in the video.
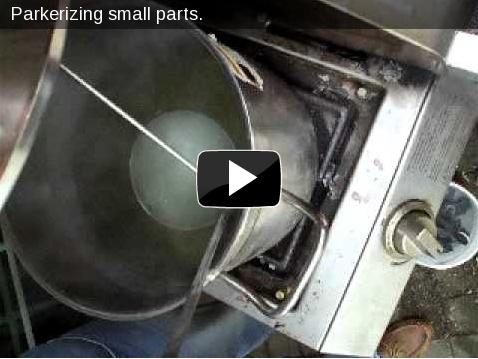
Video showing how the solution starts bubbling as soon as the parts are submerged. This shows small parts lowered into the solution in a stainless steel ladle.
The parts were fished out of the parkering solution and submerged in warm water.
For parts without through holes, we just threw them into the pot and fished them out with stainless steel hemostats.
American Science and Surplus is a good source of lab gear, including stainless steel hemostats and Pyrex beakers.
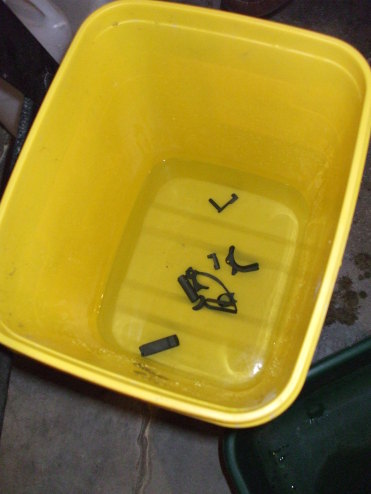
A cool water bath stops the parkerizing reaction.
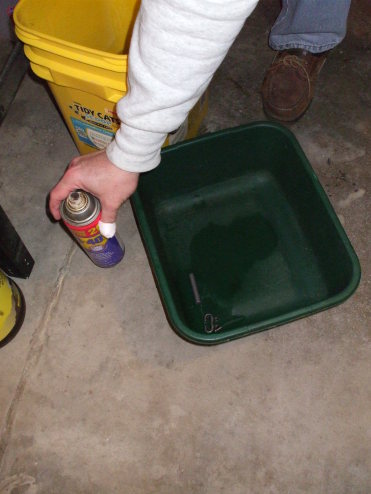
Spraying the newly parkerized parts with WD-40.
After the parts had cooled and been vigorously sloshed around in the water, they were removed, dried, and dropped into a plastic pan to be sprayed with WD-40 spray lubricant.
Some people claim that the WD-40 stops the parkerizing process. However, it sure seems to me that the parkerizing is done by the hot acid bath in the presence of metal salts. Removing the part from the hot acid and metal salt bath and flushing it with water has far more to do with ending that chemical process than any spray of WD-40.
The WD-40 spray is good, but it surely serves mainly to remove the water and any remaining acid. Make sure to thoroughly spray the parts with WD-40, fully coating and thus flushing the water away from all surfaces.
Do not be frightened by the bandaged thumb!
That had nothing to do with the parkerizing project!
The important final step is to rub gun grease into the parkerized surfaces.
The parkerized surface is rough and effectively porous on a very fine scale.
These pictures show the frame after it has been reassembled. Of course, the lubricant must be rubbed into all surfaces before starting the reassembly. This is necessary to protect all of the surfaces, including the internal ones.
The external surface now has a microcrystalline structure which can be impregnated with oil, This oil not only protects the surface from wetting and undesired oxidation, but it also provides lubrication.
Refer to the field-stripping guide in reverse to reassemble it.
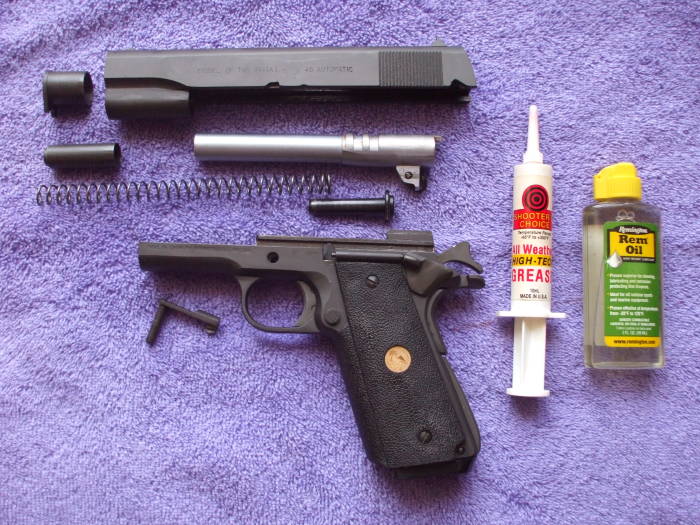
Lubricating the parkerized M1911 before reassembling it, using red "all weather high-tech" grease and a small bottle of Remington's teflon-containing "Rem Oil".

Close view of newly parkerized surfaces.
Preparing to reassemble the parkerized M1911.
Reassembly complete! View of the left side ...
... and the right side.
Now, what if you're parkerizing something and you want to avoid parkerizing some part of it? For example, an M1 Garand barrel and you don't want to parkerize the bore, chamber, and gas cylinder mounting surfaces?
Just keep the solution away from those surfaces. For the example of the M1 Garand barrel, use appropriately sized rubber stoppers in the muzzle and chamber, and electrical tape over any external surfaces to be protected.
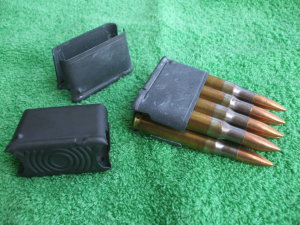
We wondered — what would happen if you tried to parkerize the spring steel clips used in the M1 Garand?
These pictures show that it can be done, and the result looks pretty good.
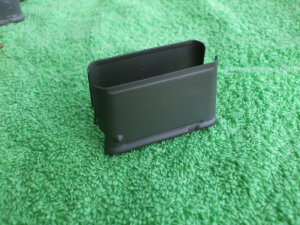
In the first picture, the left-most clip has been parkerized while the other two have not. The second picture shows a closer view of the parkerized clip.
It's not clear how concerned you need to be about oxidation of these clips, but they certainly can be parkerized!