Building an El Mariachi Style Custom Gun Case
Build a Custom Gun Case

So I was watching
Desperado
and
Once Upon a Time in Mexico
and it occured to me that the two movies
have something in common.
Salma Hayek is in both of them!
Yowza!
Uh, where was I going with this....

Um, Cheech Marin was in both of them!
So was Danny Trejo, who seems to have been in pretty much every movie Robert Rodriguez has made.
But I know that I was going on about something else...
Salma Hayek is in both of them!
No, wait, I already mentioned that....


Oh yeah, el Mariachi, the main character, has a really cool gun case in the form of a guitar case.
The greatest obvious benefit of a converted guitar case is that it could be a sturdy and secureable gun case that is not so obviously a gun case. Most gun cases might as well have tall yellow letters on the side screaming GUN CASE!
Wouldn't it be an interesting project to build one?
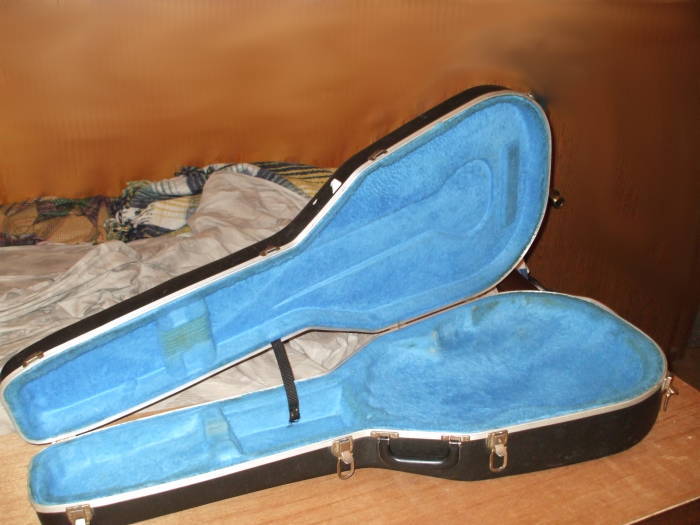
A local pawn shop had a hard-shell Ovation guitar case just barely big enough for the 44-inch M1 Garand maximum dimension from muzzle to bottom of butt plate. I snapped it up for about $30, a fraction of the price of a new one, and brought it home.
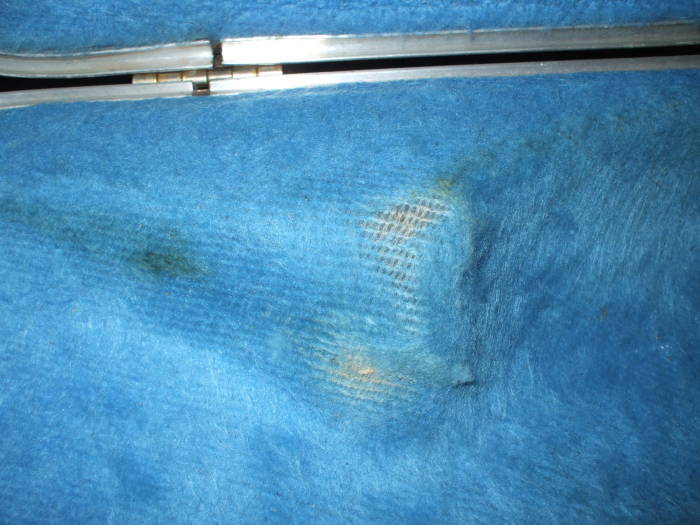
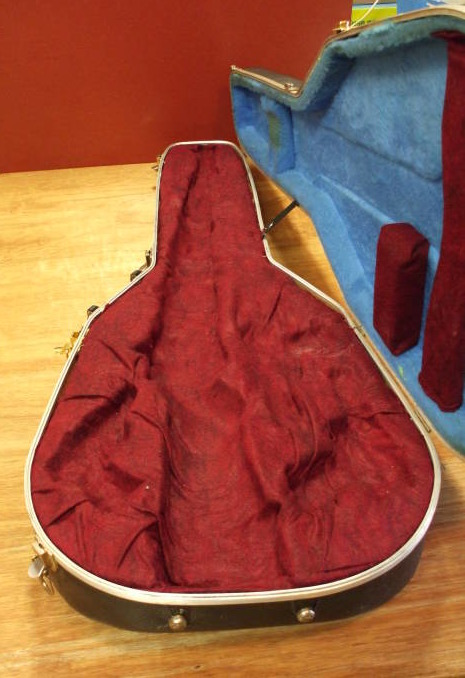
It was lined with groovy electric blue Yeti fur.
Bright blue!
This is no surprise because everyone knows that the Himalayan Yeti is a hybrid of Wookiees and Smurfs.
As opposed to the Sasquatch, which is just a hoax.


The blue fur was worn through in places.
Yeti fur ain't what it used to be.
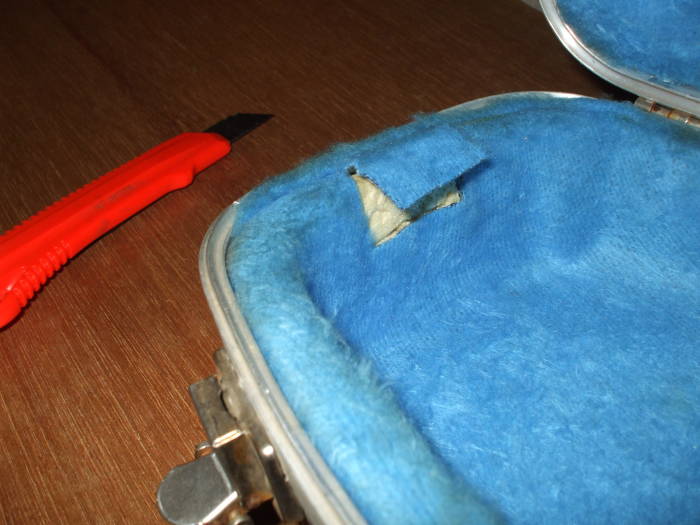
A little exploratory cutting revealed that the blue fur was bound to a black fairly rigid plastic layer, and its slick back side was against a dense polystyrene foam forming the case's interior shape.
The plan eventually became:
- Remove the blue fur from the bottom, the main body of the case.
- Trim the existing foam as needed to allow the Garand to fit into the case.
- Replace one of the latches to provide a secure and lockable case latch.
- Add that spray-in expanding foam as needed to basically fill the bottom case flush with its metal rim. The original foam is some similar expanding material, but it's a little denser and more rigid than the spray-in foam you get at the home improvement store. So trim the original as needed before proceeding!
- Cut the resulting blended foam volume as needed to produce fitted compartments for the Garand and some pistols.
- Cover the foamed bottom with felt.
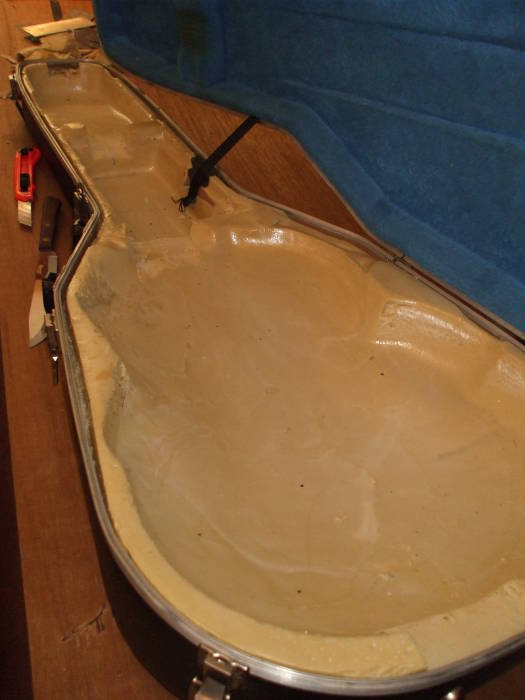
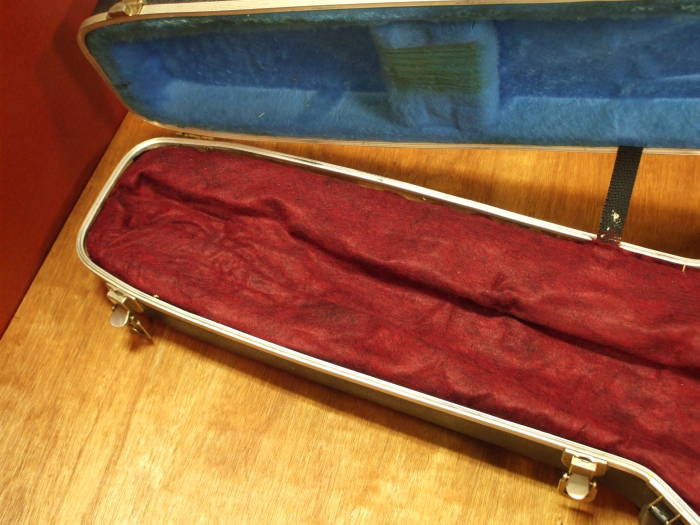
All the foam in the main body of the case had to be exposed, which meant that the blue fur in the bottom half had to come out.
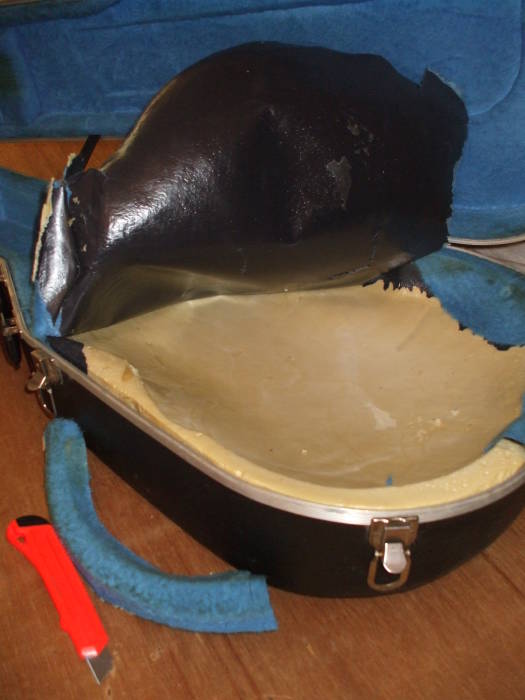
Here it is with all the main body fur removed.
And doesn't that sound like some sort of strange yetirotica reference?
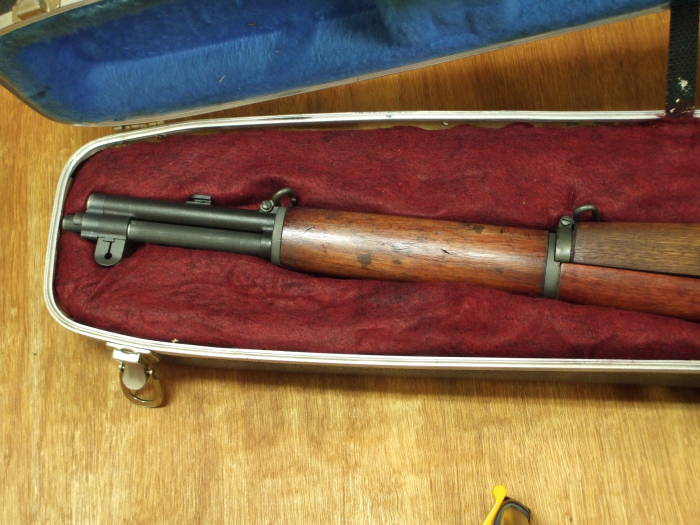
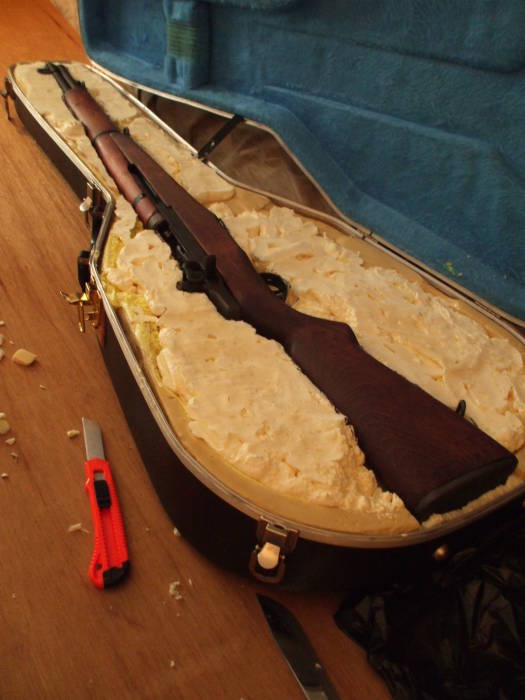
Here is a Garand laid in place. It's 44" from muzzle to butt plate, so it barely fits this case in terms of length. But of course it doesn't go into the case, at least not yet.
I needed to trim notches for the muzzle and butt plate at either end of the case. Then, two more notches for where the stock and barrel cross two molded cross-pieces originally intended for the neck of a specific guitar design.
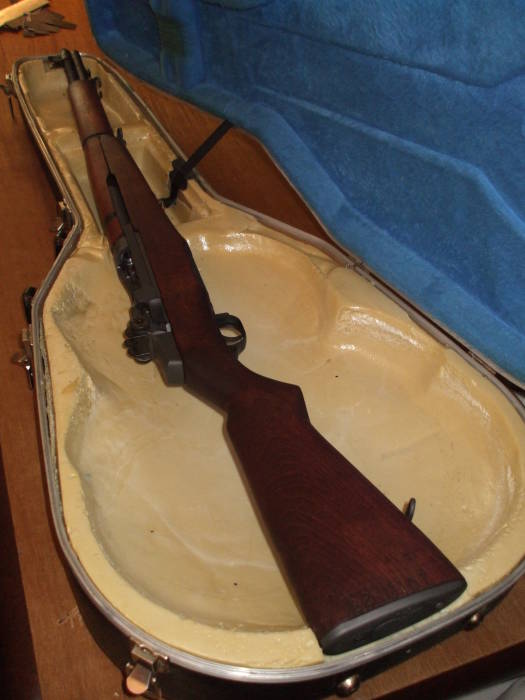
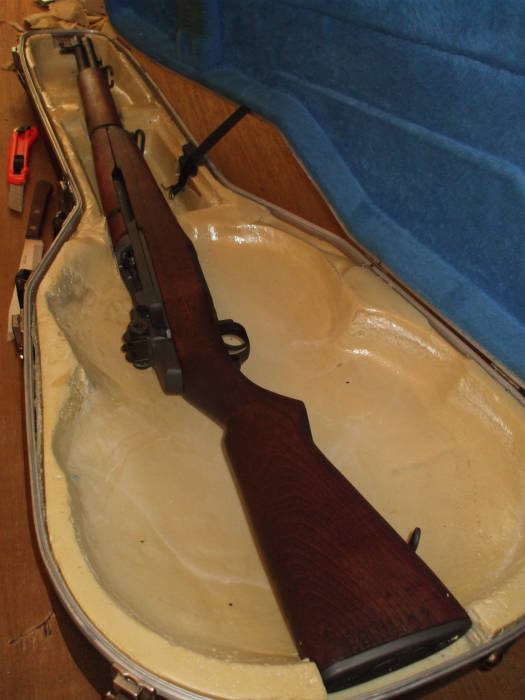
Now it fits, at least as far as going into the case so the lid could be closed.
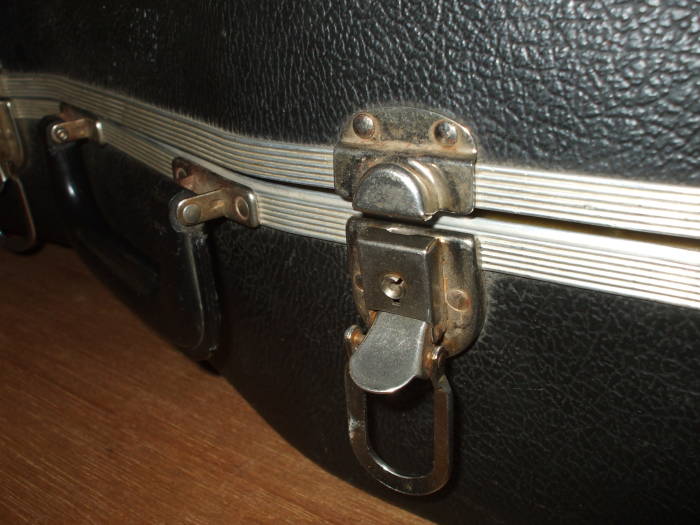
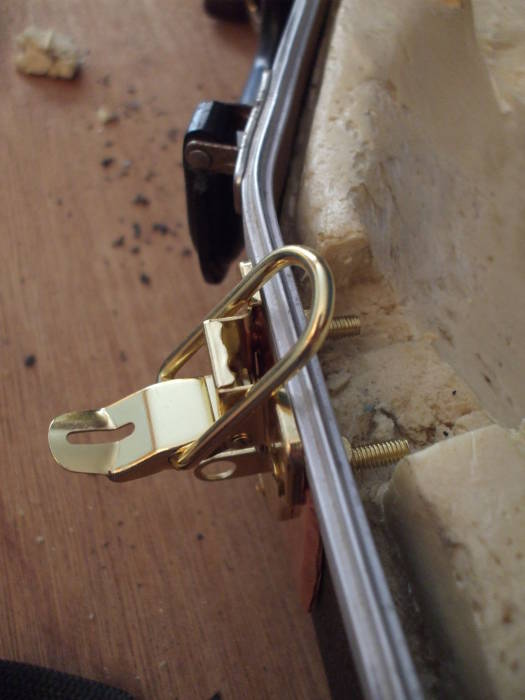
Before going any further, the very lame latches need attention. Really, partial replacement. The plan is to replace this central latch next to the carrying handle and near the center of gravity with a serious cabinet latch with a hasp for a padlock.
Brass 10-24 hardware will be used to mount the latch pieces, with the 10-24 machine screws passing through the latch, the case wall, and aluminum plates on the interior face of the case wall.
The problem is that the metal rim gets in the way. Some spacers are needed on the exterior.
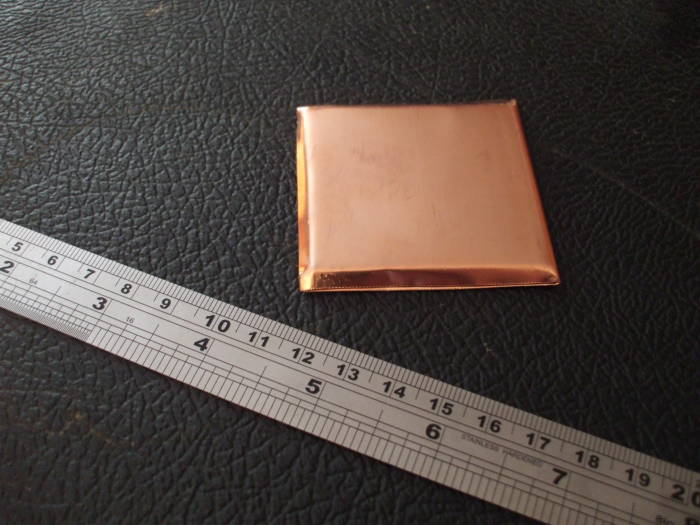
0.063" aluminum sheet would suffice, but it would look like, well, 0.063" aluminum sheet.
It will look much classier with that aluminum sheet in a beveled wrapper of copper flashing, material I already had on hand for some other projects.
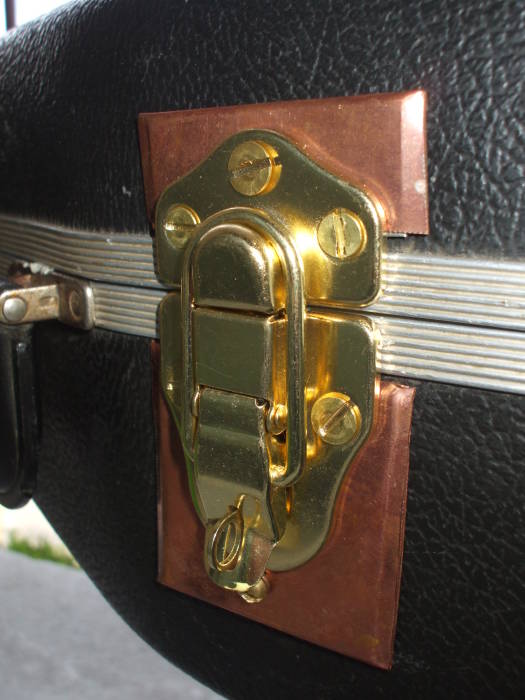
Here is that new latch in place on the case main body, and with the lid securely cinched into place.
The copper still needs a final cleaning with #0000 steel wool in this picture, before an application of polyurethane varnish to keep that bright copper and brass look.
Just be glad that I didn't build the entire case from scratch out of mahogany-stained luan underlayment, malachite pattern laminate, and brass and copper. Don't think that I wasn't tempted. Seriously.
And speaking of bulky over-design and just barely man-portable weight, there are before and after weight measurements at the end of this page. It's not as bad as you might think.
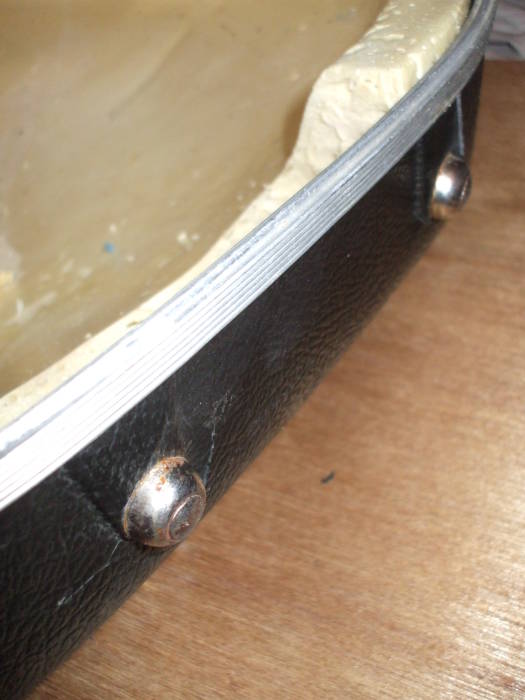
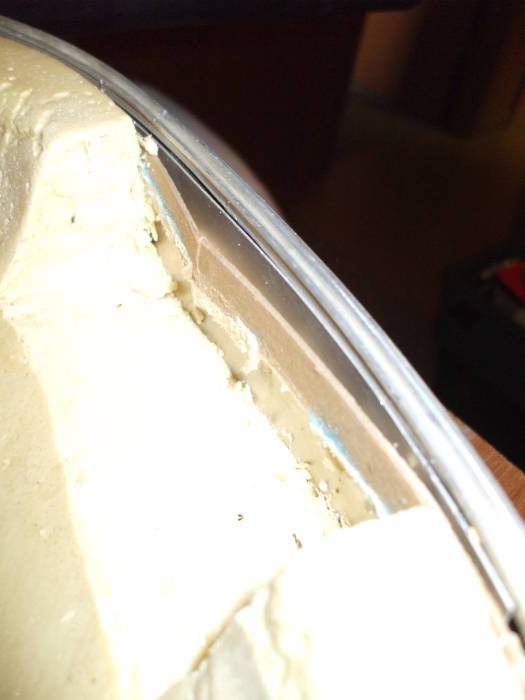
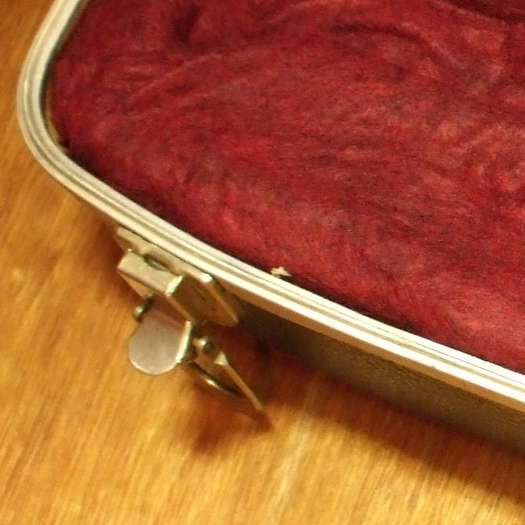
Two button-like "feet" showed the folly of relying on the plastic case for structural integrity.
Ovation, what were you thinking?
Some relatively soft aluminum sheet was cut to approximately 2.5" x 7", bent to shape and slid into place between those feet and the main foam body. The added aluminum sheet is visible here between the aluminum rim of the case body and the cardboard strip between the case body and the foam.
Now the feet can actually bear some weight.
A smaller similar plate was bent and pressed into place at the muzzle end as preventative structural bracing.
On to the foaming!
Very important first step — wear rubber gloves and do this in an area where you don't terribly mind getting extremely sticky foam stuck to things. It should also be the standard well-ventilated area: no open flames, no breathing of the concentrated fumes by man or beast, etc. For example, a concrete balcony with brick walls. Make sure you have a steel brush handy to remove errant foam globs the next day.
I initially tried taping garbage bag material across the rim of the bottom half and filling it with the supplied thin nozzle pushed through the plastic.
That did not work.
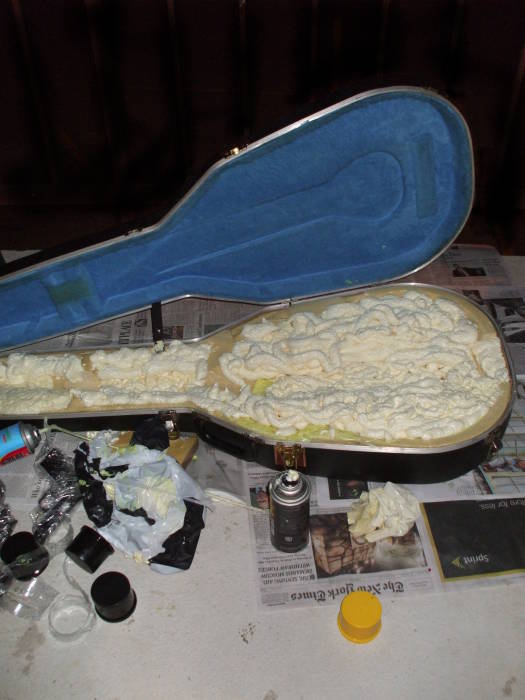
I removed the plastic sheet and simply sprayed the foam into the large tub shape to fill it with coils of the nasty sticky expanding foam as you see here. I did not use the screw-on plastic tube nozzles.
Just invert the can and bend the short nozzle on the can valve so it comes out like the Devil's own cake frosting. Make sure to only spray it with the nozzle down, otherwise you risk losing propellant and not driving out expanding foam.
I used Fill and Seal Expanding Foam Sealant from the Dow Chemical Company, based on the highly technical reason that it was the cheapest. It comes in 12 ounce (340g) cans and it claims to expand to about 3X can volume. That seemed about right.
Dow's "Great Stuff" Big Gap Filler Expanding Foam Sealant is a newer product that might be better. It is specifically designed to fill larger gaps in home insulation projects, or in the case of this project, fill the needed volume with fewer cans and lighter resulting weight.
An important concern is the chemical environment within the case when it's finished. The expanding foam seems to be full of organic chemicals, some of them somewhat nasty (and most of them extremely sticky!), but no water-based anything.
That's good.
I had never used this material before, so I didn't know how much I needed. I described the project to the guy at the hardware store as a toolbox, not wanting to seem too nutty. I now think he assumed I meant something like putting a circular saw into a case in which it barely fits.
To be fair, this might be a somewhat unusual application.
I used three cans.
Important — while you're at the hardware store you should read all of the cans of expand-o foam, even the expensive ones you don't plan to buy. It doesn't seem like any one container tells the entire story about how to use expanding foam. Other important details include:
- Only spray inverted (nozzle lowest), or at least that's an issue with some can designs.
- Time to form an initial skin (30 seconds or so) and time to fully cure (8 hours seemed to be the consensus).
- The cans are one-use-only. There is no using part of a can now and the rest of it later.
- Cleanup is impossible, except for what you can do with a wire brush. Wear rubber gloves and old clothes.
I knew that some areas only needed partial filling.
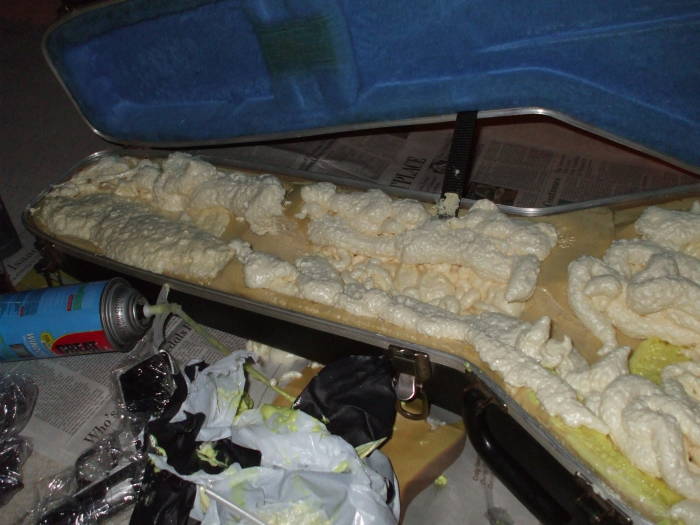
The barrel of the M1 would occupy most of the middle of the neck. I could judge where filler was needed by the notches I had carved into the original foam.
I needed a little in the bottom of the neck but only needed to fully fill it along either side.
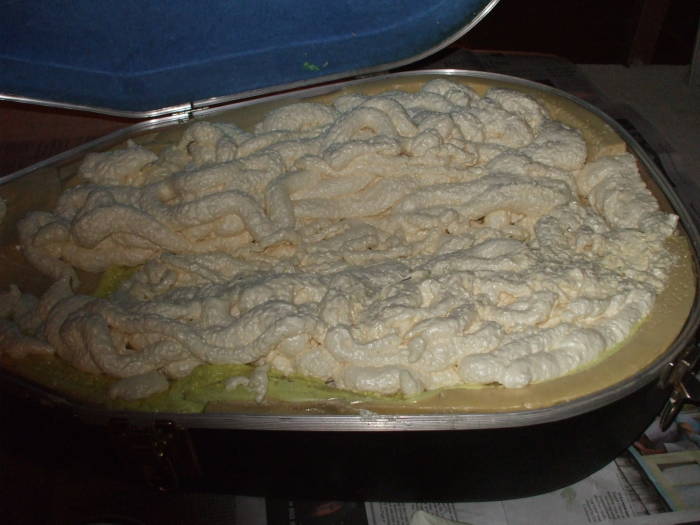
The main "bowl" for the guitar body needed to be mostly filled, but again a narrow area through the center would just need to be cut out eventually.
OK, there's a nasty gooey foamy mess.
Leave it alone and let it cure for 8 hours or more.
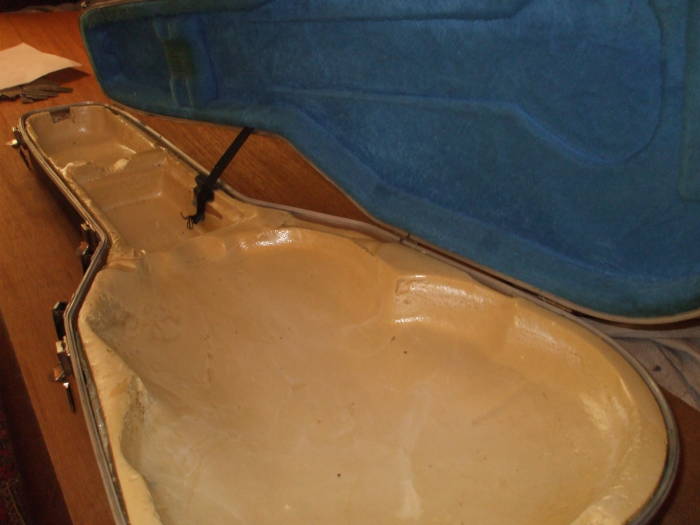
Here it is the next day.
What a gruesome looking mess.
But it has cured.
Now it's time for the initial trimming — some with the sharp box cutter knife seen in other pictures, some with this extremely dull large kitchen knife.
Despite its extreme dullness, it can cut this stuff.
The large blade helps to get a more planar cut.
Here I have sliced the foam so that everything is below the surface formed by the metal band around the lower main part.
Well, a very rough approximation to that surface....
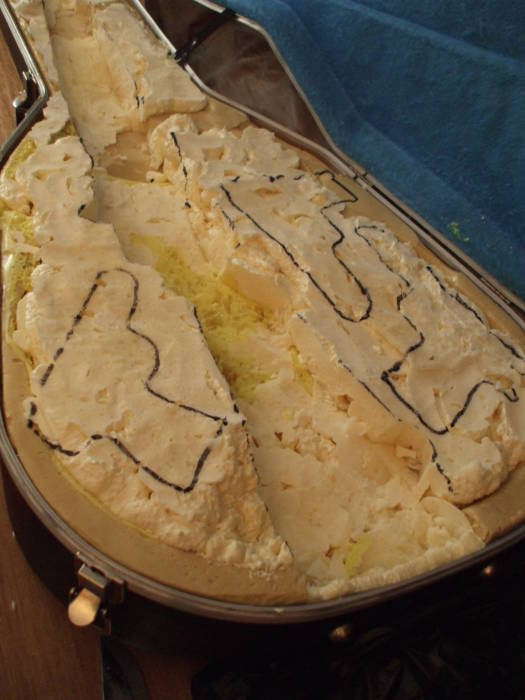
Lay the Garand where it should go and trace around it with a marker. Here is that crime-scene style result.
After some cutting and carving using just the sharp knife, the Garand fits!
Carefully think through what you're doing with the cutting.
You can cut more or less straight down along that traced line with the blade extended to the appropriate length.
Most of the perimeter of this object as it lies on its side is round. Cylindrically curved edges of the butt stock, cylindrical shapes of the rear hand guard and oval shape of the forward hand guard, and so on.
Also consider the thickness of your marker and whether you held it vertically (drawing an outline outside the real profile) or tilted it to correct and draw the line directly under the real profile. Your line is probably outside the real profile at least by a little, even if you tilted the marker as you drew.
So, the blade can be tilted so the cut intersects the drawn line and the blade tip is slightly toward the object axis.
The result of that would be a pit with slightly sloping sides, just big enough for the traced object.
That is, once you manage to cut the floor of the cutout. The trickiest part is getting the cutout floor roughly horizontal.
Now repeat for some pistols.
Trace, then carve....
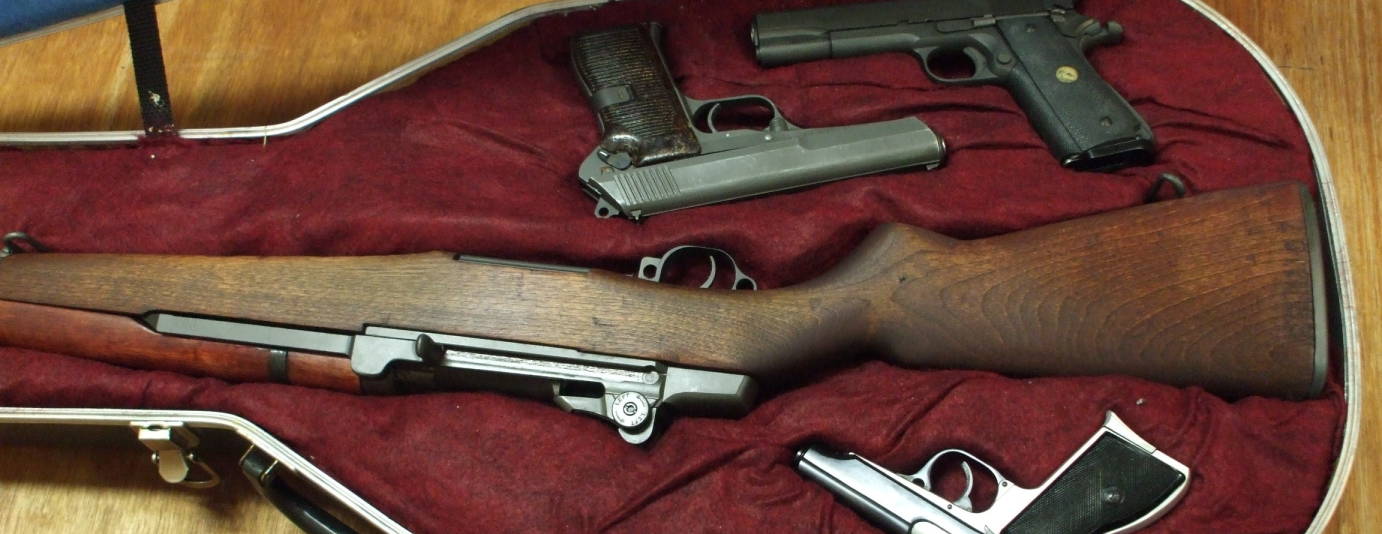
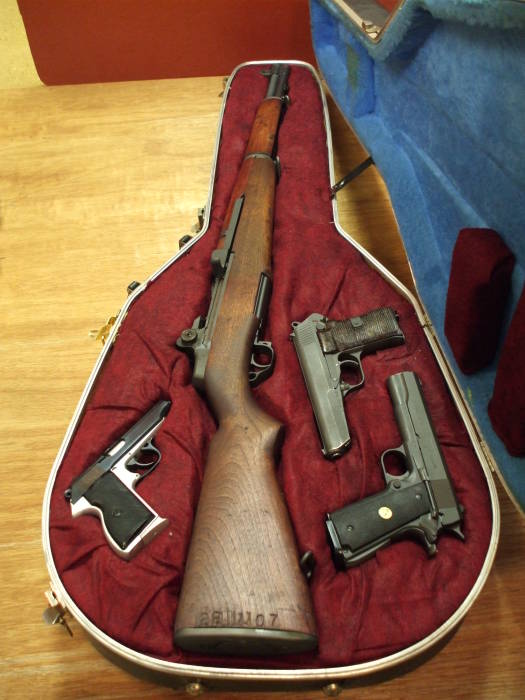
And multiple custom-fitted compartments!
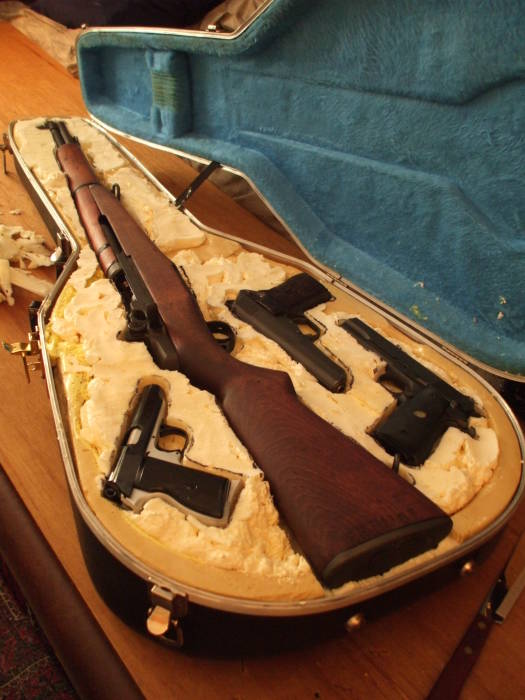
Clockwise from left:
- FEG PA-63, or Fegyver És Gépgyàr PA-63, a Hungarian clone of a Walther PP. It has a Makarov-style "thumbrest" left grip panel, but that just means you carve a corresponding divot into the foam. It shoots 9x18mm Makarov.
- Česká Zbrojovka vzor 52, a Czech 1950s military/police pistol shooting 7.62x25mm Tokarev.
- Norinco clone of an M1911A1, so .45 ACP.
The FEG PA-63 and ČZ vz 52 were payment for building the site for Harrington Products and their custom CZ-52 firing pins, extractors, hardened rollers, and other custom parts.
You will have plenty of foam scraps at this point. Find suitably sized and shaped ones to jam into any small voids. I had some voids below the Garand cutout as that was getting down into the layers of foam formed by my initial failed experiment in foaming through a plastic sheet. I had gotten most of one can's worth of foam into the case that way, but it was erratically scattered around and had partially cured by the time I got around to going to the store to buy a second and third can of foam and removing the plastic sheet.
I used a little plastic packing tape in places to hold the scraps in place. For example, those larger voids right at the case body-neck transition.
I also used it to reinforce the thin foam walls between the Garand stock and the two pistol butts.
Now for the felt lining.
This gets somewhat frantic, so there are no pictures of that work in progress. This picture is from after all the steps described below.
I got an adequately large sheet of felt. Hobby Lobby is a chain where you can select from a fairly wide array of color choices. It's an odd place, in mid-August they had a lot of store area dedicated to selling Christmas trees and other Christmas decorations. They're held up as some champion of Christianity, but most of what they sell is manufactured in the People's Republic of China where pretty much all religion is suppressed.
Very important — the adhesive used with the felt must not be water based like Elmer's white glue! That sort of glue is always releasing some water vapor, either from the initial curing or from water that it has absorbed from the air later. Do not use Elmer's glue or similar boiled-horses-based adhesives!
I used an entirely different product from the Elmer's company, their Multi-Purpose Spray Adhesive.
Right on the front of the can it lists some attributes
that suggest an entirely non-water-based nature:
• Extremely flammable
• Eye irritant
• Vapor harmful
• Harmful or fatal if swallowed
On the rear it lists acetone, dimethyl ether, isohexane, and n-pentane as ingredients. It also claims to be useful on a wide array of material including felt and plastics.
Yeah, this is the stuff.
Here's how I used it. I did it a little at a time, working out from the center and up from the cutouts:
- Cut out an oversized rectangle of felt, more than enough to cover the foam surface, including going down into the cut-outs. Make sure you have enough for that plus another 30 cm or so on all sides. You might place the rectangle a little off-center, and you will need at least 3 cm or so to stuff down into the thin space between the foam and the case shell. Felt is cheap, make it big enough, but not so big that it's hard to handle.
- Put on another pair of rubber gloves.
- Spray adhesive onto the floor and walls of the central channel for the Garand.
- Press the large rectangle of felt into place in that channel, trying to get it into place so the felt goes fully back into the floor/wall corner in that channel. You have something like 10-20 seconds to get this done during the initial contact stage, so work quickly!
- Spray adhesive onto the flat "plateau" between the Garand channel and the pistol pit(s) on one side only, and down into those pistol pit floors and walls.
- Press the felt into place throughout those pistol pits, again making sure that the felt extends fully into the floor/wall corners.
- Repeat that for the pistol pit(s) on the other side.
- Spray adhesive onto the "plateau" on one side of the barrel continuing back on the same side onto the surface between the pistol pit(s) and the case rim.
- Press the felt into place there.
- Repeat for the other side.
Now trim the felt all the way around so you have something like 3 cm hanging beyond the metal rim.
At this point you will realize two things. First, you have accidentally glued the felt to the aluminum rim of the case. Second, given the poor structural integrity of felt, you can pull it loose from just the rim while leaving it stuck to the foam of the case. So do that.
Now find a dull knife. I used that big dull kitchen knife you saw earlier. People who actually keep their knives sharp may need to use something like a butter knife.
Use that large dull blade to work the felt fringe down into the space between the foam and the case.
Continue that process all the way around.
You may need to do some extra trimming to work around things like the nylon strap that stops the lid at about 90° open.
You will also notice a few blobs of spray foam. You can cleanly remove it from metal, as on the aluminum case rim seen here, but that's about it.
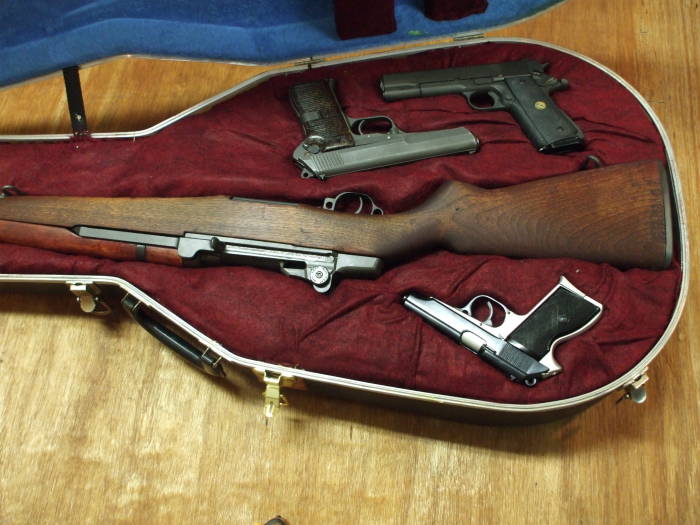
Here is the finished product fully populated — electric blue Yeti fur above, dark red ("cranapple" they called it) felt over custom shaped foam below.
I had to add a couple of spacer foam blocks, wrapped in the dark red felt and glued to the lid, to keep two of the pistols in place. That side could have used a higher base level before carving the cut-outs.
Starting weight: 3.7 kg (8.1571037 pounds) for the case as configured for a guitar.
Final weight: 4.3 kg (9.4798773 pounds) for the modified case with the added foam, new latch, aluminum braces and felt.
Fully loaded: 11.2 kg (24.691773 pounds) with all four guns.