Safely Loading the M1 Garand Rifle
Avoid the Dreaded Garand Thumb!
Many would-be target shooters are skittish of the
M1 Garand as they have heard that it has a nasty bite.
They have heard horror stories about the Garand Thumb,
caused when the powerful main spring slams the user's thumb
between the bolt the receiver.
This can make things worse instead of better — the
nervous user does something awkwardly that jars the
bolt loose and ... BANG.
Here is how to safely load an M1 Garand:
Start, of course, with an empty rifle!
While the whole point of this exercise is to insert ammunition into the rifle, make certain that you are starting in a known safe condition.
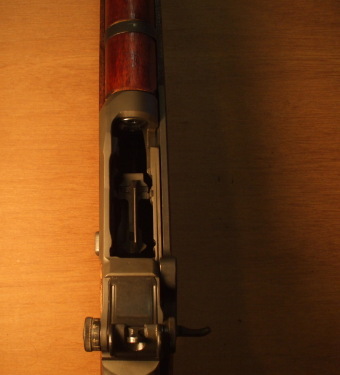
Pull the operating rod handle back firmly to its stop, then allow it to gently move forward until it is stopped by a latch. We will examine that latch in a bit. For now, make sure that the bolt and operating rod handle are securely locked back.
You should see the follower in the magazine area, having moved to the top of its possible range of movement. In front of that you should see an empty chamber.
Yes, I referred to that as the "magazine area". I realize that the Garand uses an en bloc clip instead of a detachable magazine, I'm using the word "magazine" here in the naval sense to mean the area in which the ammunition will be stored.
Prepare your en bloc clip
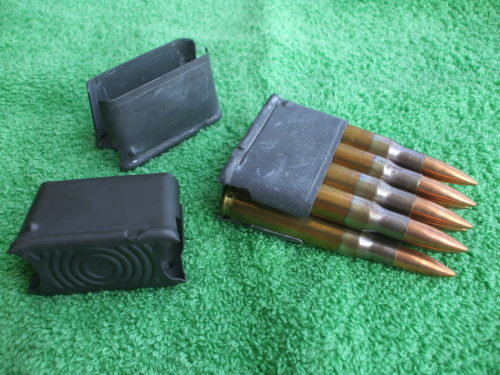
Here we see three en bloc clips, one of which is loaded with eight .30-06 cartridges.
There are two ways of loading a clip. What you see here will place the top round on the right.
Visualize how the rounds will be aligned when this is loaded into the rifle. The size of the clip requires the left and right columns to be staggered. As aligned here, no matter which way you align the clip before insertion, the right column will be the higher one and the first round loaded will be the uppermost one, the upper right.
You could just as easily load the clip the other way, so the left column is the higher one. The gun functions the same either way.
However, right-handed shooters will find it a little easier to load the clip with the right column highest, as seen here.
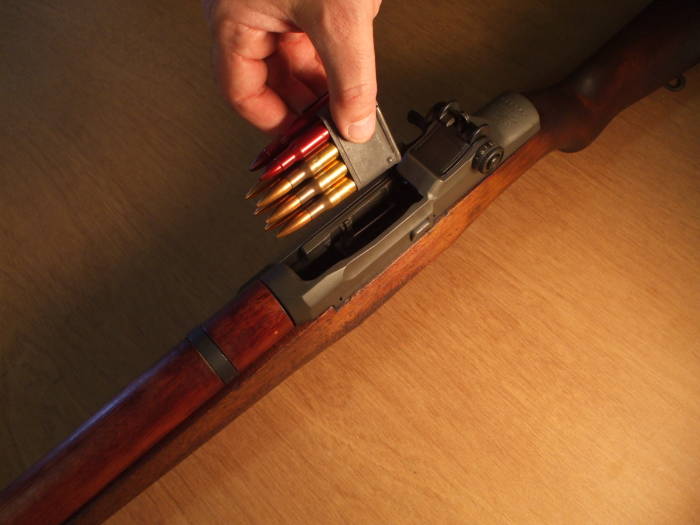
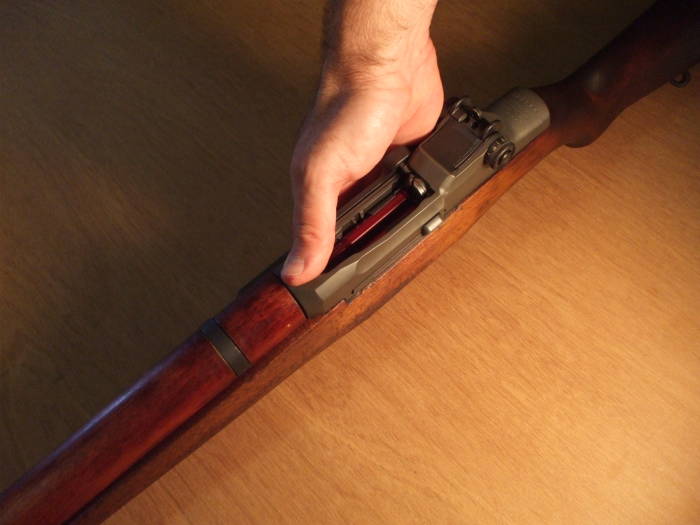
Prepare your rifle
We are ready to load the rifle. The bolt and operating rod handle are locked back. Notice the tab on the clip latch, the narrow pivoting piece protruding from the left side of the receiver. The clip latch has rotated slightly back into the receiver as the bolt latched open.
Place the safety in the "on" position by pulling it back into the trigger guard.
Ideally, you would continue from this point with the butt of the rifle against your thigh or the shooting bench. For practical matters of photography, this shows the rifle laying on a horizontal surface. However you do this, keep the muzzle pointed in a safe direction.

Prepare to load
Amazon B002E6R66O
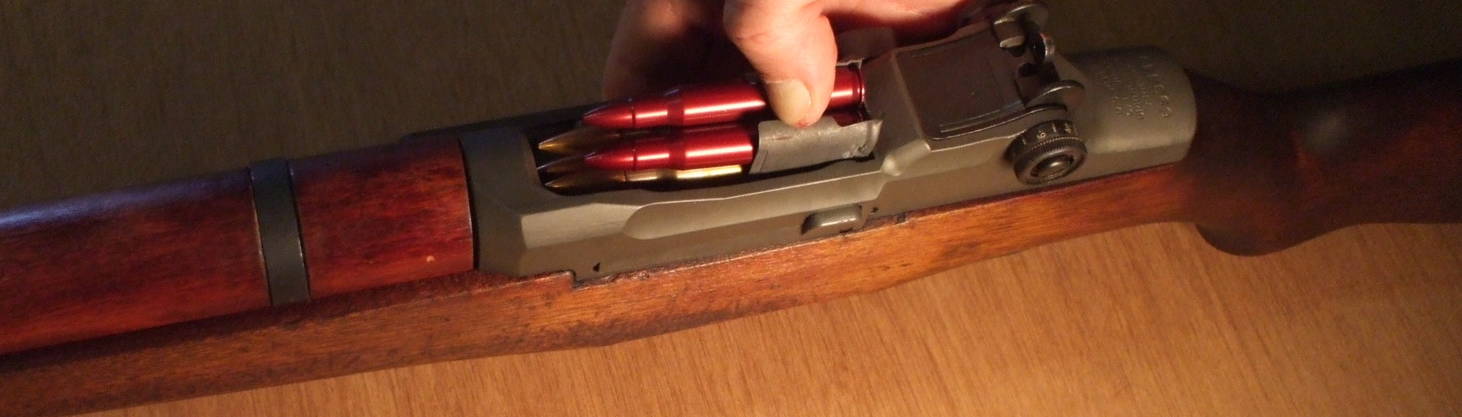
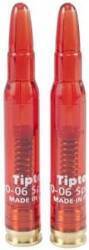
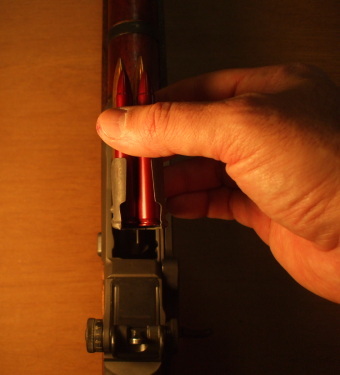
For this demonstration, I have replaced the top two of the live .30-06 rounds with practice "snap-caps", obvious here as they are made from red anodized aluminum.
Snap-caps have all the function I need for this demonstration, there's no need for me to use live ammunition. Take no unnecessary risks.
Notice the small bump at the corner of the en bloc clip. There is one on the corresponding opposite corner, so that there is a bump at the lower left corner of the clip regardless of which way it is inserted. That bump or dimple is used to retain the clip in the rifle until the ammunition is exhausted.
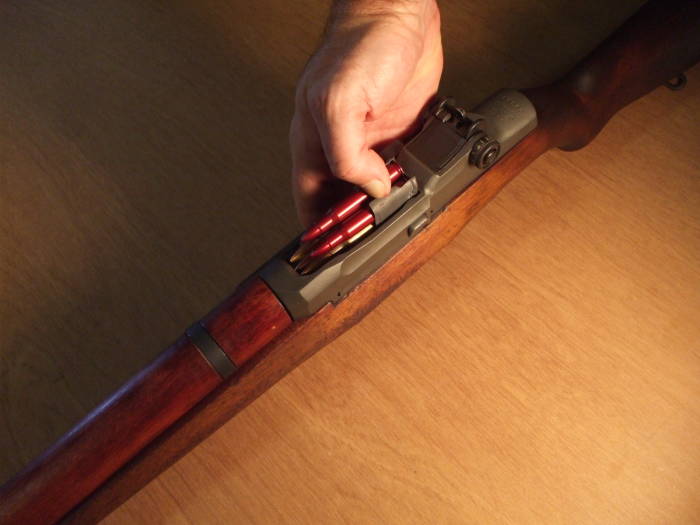
Press the clip into place
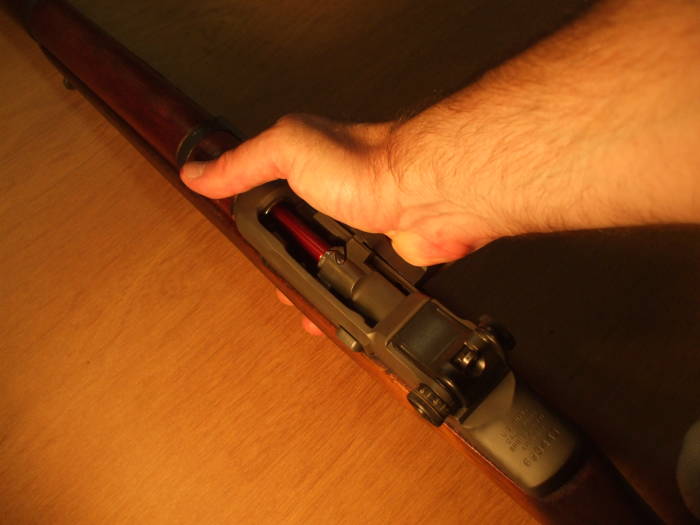
Use your right thumb to press the clip into place.
As you might imagine, it was rather difficult to be my own model for these photographs. My thumb should be straighter, pushing the clip down into the magazine area.
Here is where right-on-top is a little better clip loading order for a right-handed shooter, who will be loading the rifle with their right hand as seen here.
Amazon
B0048KKEKE
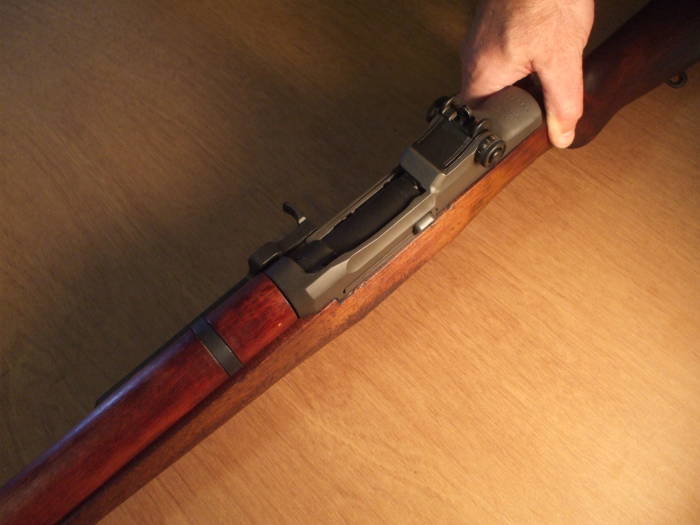
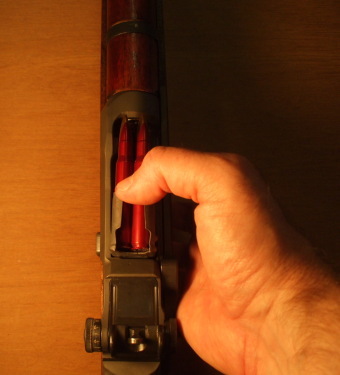
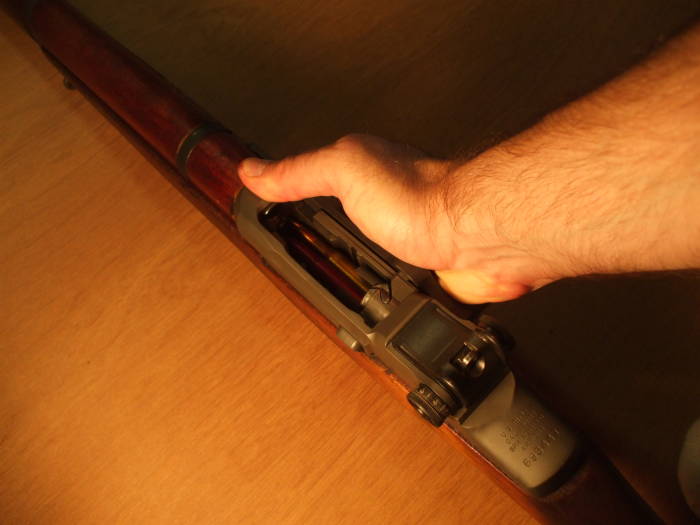
Here is where you need to be careful.
The bolt should stay back because the operating rod is latched in place. However, you might jar it loose early. In the condition shown above, there is nowhere for the bolt to go as the rear face of the clip is in its way. But when you have the clip almost all the way in place as seen here, there is clearance for the bolt to slam forward.
The bolt then attempts (but should fail) to chamber your thumb. This result is called Garand Thumb.
To prevent Garand Thumb, insert the clip with your hand in the position shown above and here. Your palm travels down next to the right side of the stock with the heel of your hand blocking any sudden forward travel by the operating rod handle.
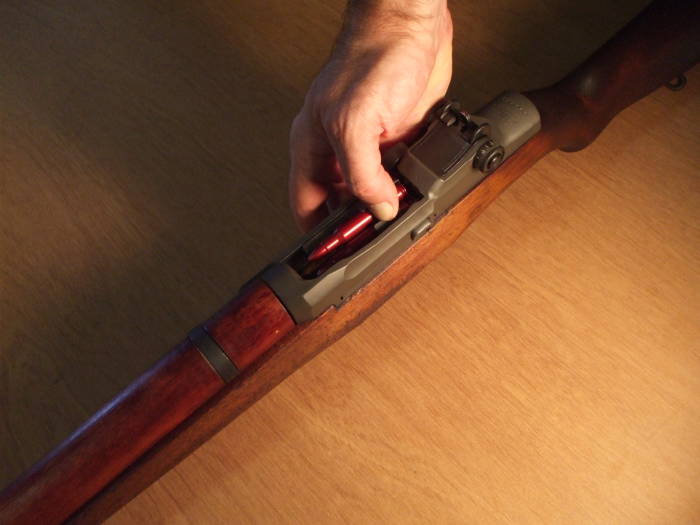
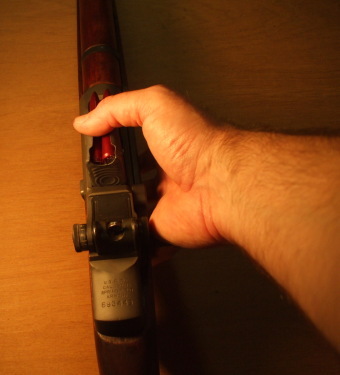
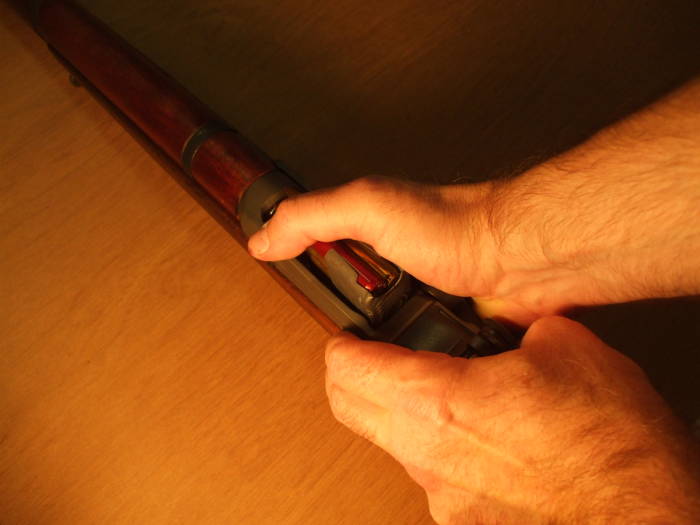
Get your thumb out of the way!
The bolt will want to close when you get the clip fully seated. Get your thumb out of its way!
I was about to type "remove your thumb", but that is what the bolt tries to do. Simply move your thumb out of the way.
Allow the bolt to close.
Read aboutGarand Thumb in
Gravity's Rainbow
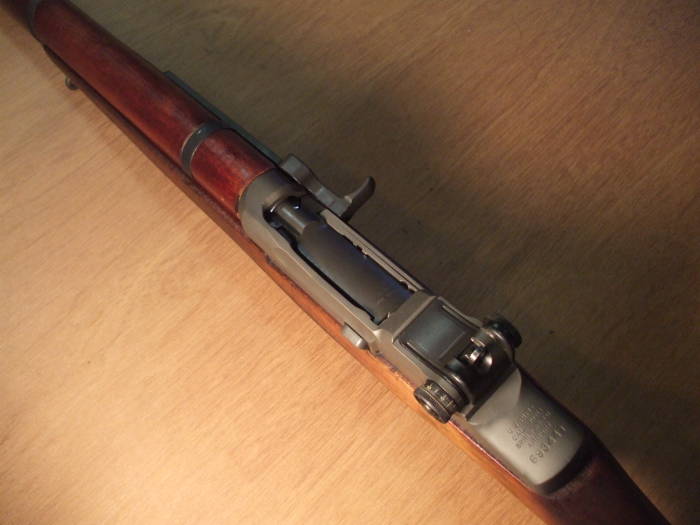
The operating rod spring, the main spring of the weapon, should be exerting enough pressure to close the bolt quite sharply. If it doesn't, you can help it with your right hand.
Here, however, the operating rod spring has done its work and the bolt is fully closed and locked into place by a slight rotation toward the right.
We can observe that same sequence from above:
Unloading the M1 Garand
The bolt is closed on a chambered round. Place the safety in the "on" position.
Again, this would typically be done with the butt resting against your thigh or the shooting bench. For practical matters of photography, this shows the rifle laying on a horizontal surface. However you do this, keep the muzzle pointed in a safe direction.
Draw the operating rod handle back with the heel of your right hand. Your right thumb can then keep the round from being thrown by the ejector.
Remove that extracted round with your left hand and place it some place safe.
You will find that the clip and the remaining rounds stay down in the magazine area.
Notice that angled clip latch projecting from the left side of the receiver below the rear of the opening.
Press that clip latch lever with your left hand while using your right thumb to catch the clip and remaining cartridges as they are ejected by the rising follower.
How does the bolt latch back?
You will never solve this mystery by peering down into the magazine area around the bolt! It becomes evident when you have field-stripped the weapon.
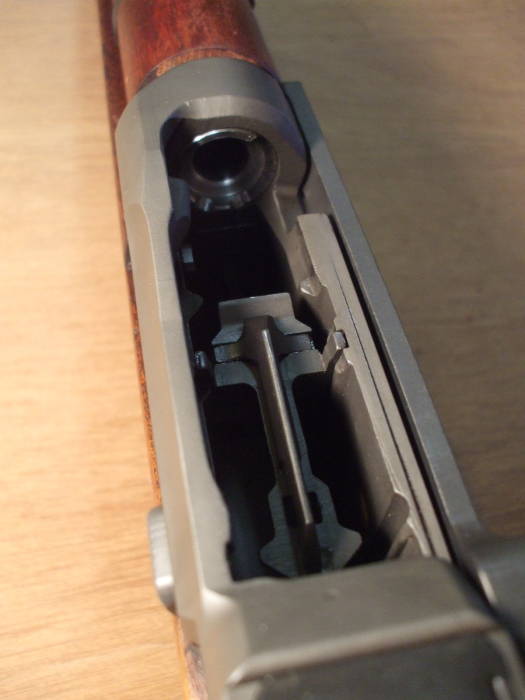
We are looking at the left side of the front of the
receiver here.
The heavy part bearing the stampings
G 19A R R and
28291-17 is the receiver itself.
The curved piece stamped D35382 9 9A
is the operating rod.
Notice the angled tab on the bottom of the operating rod, and how it is caught on a correspondingly angled piece tucked underneath it.
That lower piece is the operating rod catch, and here it is doing the job its name describes.
It is only able to do this when the follower has moved all the way up and the empty clip has been ejected with the characteristic PING.
If the operating rod handle moves slightly to the rear, toward the left in this view, that catch can disengage as seen here in the first picture.
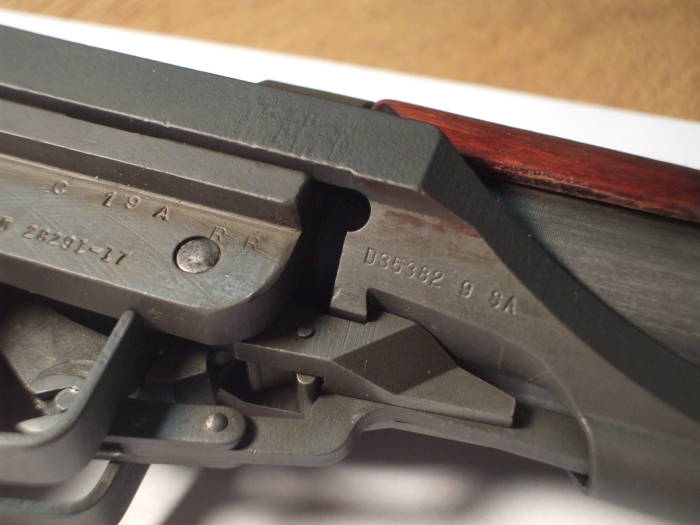
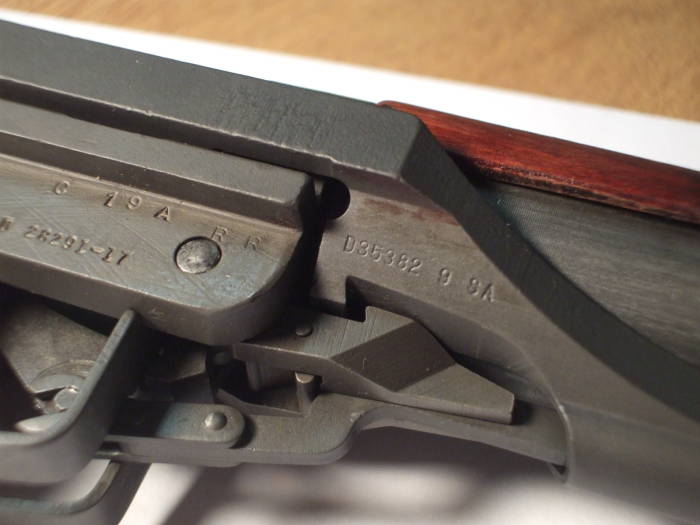
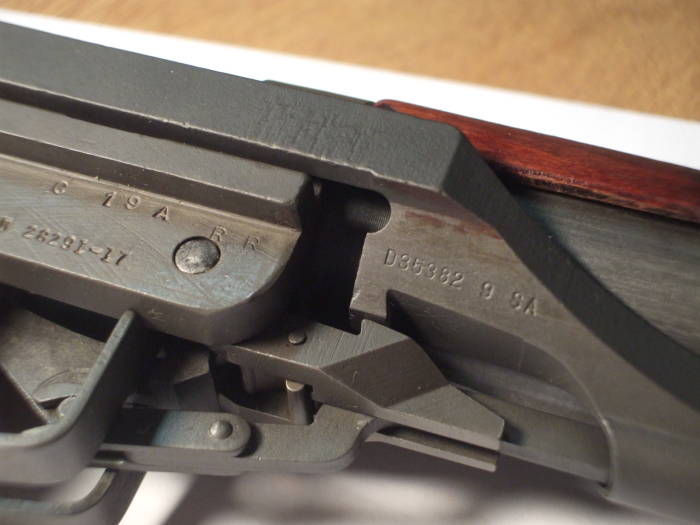
If the catch becomes disengaged while the follower is depressed at all, the operating rod can move forward past this catch as seen in the last picture above.
If you have finished pressing the clip into place and moved your thumb out of the way, this is good!
But if your thumb is still in the way, here comes a case of Garand Thumb.

