How to Field Strip the AK-47 Rifle
The AK-47
Field stripping is the term for disassembling a gun into its major components or assemblies. You don't completely disassemble it, but you break it down enough that you can clean and lubricate it. As the term suggests, this is something you might do in the field while further disassembly requiring special tools would be done back at the armory or shop. Here is how to field strip a Kalashnikov AK-47, disassembling it into its major components.
The Kalashnikov is really a family of related designs. It all started with Mikhail Timofeevich Kalashinikov design of the original Автомат Калашникова 47, Avtomat Kalashnikova 47 or Kalashnikov Automatic Rifle 1947 Model.
English speakers might informally refer to it as the AK, while Russian speakers say Калаш or Kalash.
The rifle is a sturdy and utilitarian item produced world-wide in vast numbers. About 75 million AK-47 and 100 million AK-type rifles have been built so far.
It was originally manufactured at the Izhevsk Mechanical Works, the Izhevskiy Mashinostroitel'ny Zavod or Ижевский Машиностроительный Завод (abbreviated in the common Russian style as IZHMASH or ИЖМАШ).
The original design used a stamped sheet metal receiver, but there were manufacturing difficulties in welding the guide and ejector rails into place. So, a heavy machined receiver was used instead, using some tooling and labor force for the Mosin-Nagant receiver production. Production rates were still limited, and the AK-47 could not be issued in large numbers until 1956.
The most common AK-47 by far is not, strictly speaking, an AK-47! It is an AKM — Автомат Калашникова Модернизированный, Avtomat Kalashnikova Modernizirovanniy, the "M" is for "modernized". The AKM uses a redesigned stamped sheet metal receiver, and is just about two-thirds the weight of the previous model. It also includes a hammer retarder, sometimes called a cyclic rate reducer, to prevent the weapon from firing "out of battery" or when the bolt is not fully closed.
The AKM was introduced into Soviet Army service in 1959, and is by far the most common of the AK series. It was issued throughout the Warsaw Pact nations and in Soviet client states and allies around the world.
The AKM receiver is a three-sided rectangular channel stamped from sheet metal, with a rear stock trunnion and a forward barrel trunnion riveted into place. Rails to guide the bolt and eject the empty cartridge are spot-welded into place on the interior faces of the sides. Narrow rails are formed by a short fold at the top of each side. A rigid tube across the receiver near the center provides added strength.
The barrel is pressed into the forward trunnion and held in place with a pin. The original AK barrel was threaded into place. The AKM adds a muzzle brake with a slanted opening that directs expanding gas up and to the right, to reduce muzzle rise during automatic fire by a right-handed user.
In the early 1970s the Soviet Union started issuing an AK variant firing the 5.45x39mm cartridge. The AK-74, officially released in 1974, entered service in 1978. Over half the parts are the same as the AK-47, and its operation is identical.

Amazon B009BQUIAG
The evolution continues, with the AK-101 rifle and AK-102 carbine firing NATO 5.56x45mm, and the AK-103 and AK-104 rifles firing 7.62x39mm, all of those intended primarily for export. And, the AK-105 carbine firing 5.45x39mm, intended to replace the AKS-74U within the Russian military. The AKS-74U is a shortened carbine, the U (or У) is for укороченный or ukorochenniy, "shortened". Then there are the AK-107 (5.45x39mm) and AK-108 (NATO 5.56x45mm) with a recoil system. The AK-12, originally called the AK-200, is under consideration for issue to the Russian Army.
Field Stripping The AK-47
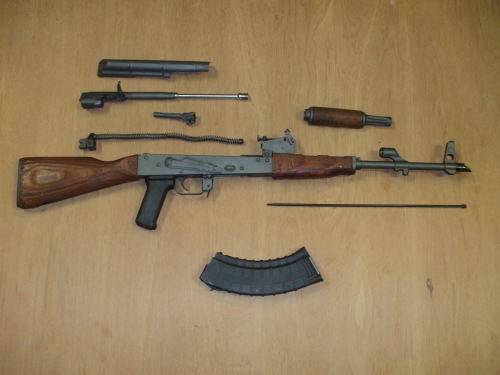
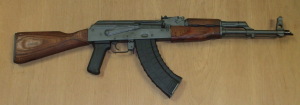
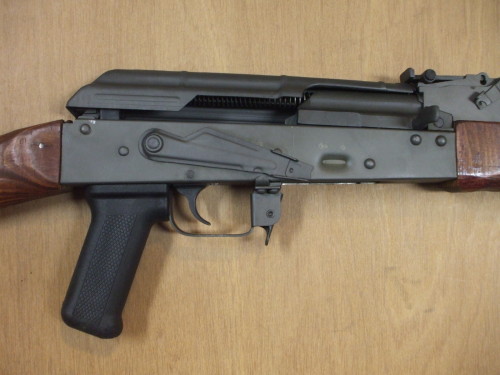
OK, that's plenty of history. Let's get to work! This example is actually a Romanian model, the Pistol Mitralieră model 1963, usually abbreviated PM md. 63. It's a Romanian copy of the AKM firing 7.62x39mm.
Start, of course, with an empty rifle!
Make absolutely certain that the weapon is unloaded.
The magazine follower is the plate that rises under spring pressure to lift the top round into place for chambering.
When the magazine is empty, the follower will lock the bolt back, as seen here.
Pull back on the bolt handle to release the pressure on the follower, and remove the magazine.
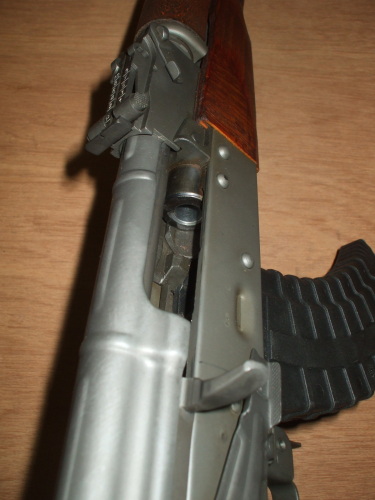
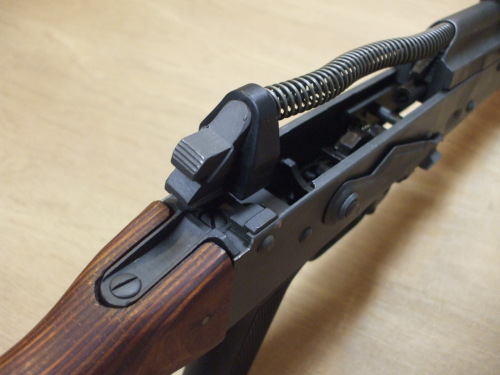
Notice how a button protrudes through the rear of the receiver cover. Make a mental note of how far this protrudes out of the sloping rear face. When it comes time to reassemble things, you need to get everything back into its place. That includes this button.
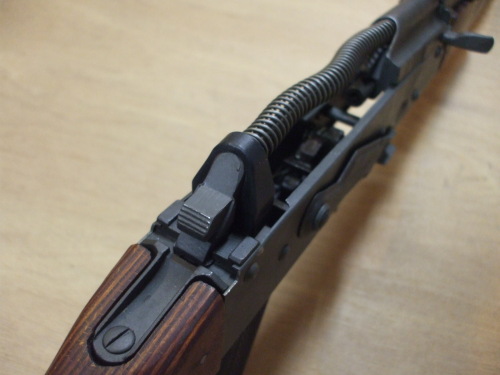
The forward curved end of the receiver cover fits into a semi-circular slot in the rear sight block. The AKM receiver cover is stamped from thin sheet metal, thinner and lighter than the original AK-47 design. The ribs running its length and around its curved surface improve its strength.
If the forward end of the receiver cover is not fully mated into its semi-circular slot, the rear end of it will not drop far enough to allow this retaining button to fully pop out through the hole. The sheet metal cover could be sent flying if the gun is fired when it is not properly maintained.
Amazon B01MUAL2CY
Press that retaining button into the receiver cover, and begin to lift the cover off the receiver. The cover will rotate around its front end, which is still in the semicircular slot in the rear sight block.
Lift the receiver cover off and set it aside.
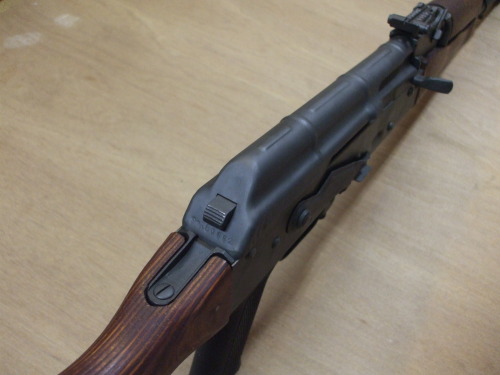
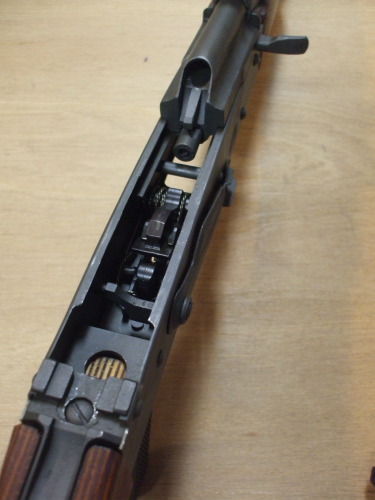
Notice the recoil spring assembly. If you did neglect to fully latch the receiver cover into place, you might get hit by that cover. But that's just a lightweight piece of stamped thin sheet metal.
You shouldn't get hit in the face by the bolt carrier, because it is retained by the receiver and the recoil spring assembly.
The bolt carrier slides on the rails formed by the narrow folds at the tops of the receiver sides, so it can't move up off the receiver. It can't move far enough back to reach the notch at the rear of the rails, as the retainer and the black rubber buffer are in the way.
To put it another simpler way: The receiver cover keeps dirt out of the receiver, it does not keep the bolt and bolt carrier in their place.
Push the recoil spring guide forward, compressing the recoil spring into the bolt carrier. When the spring guide exits its slot in the rear trunnion, you can lift it up and pull the recoil spring assembly out of the bolt carrier.
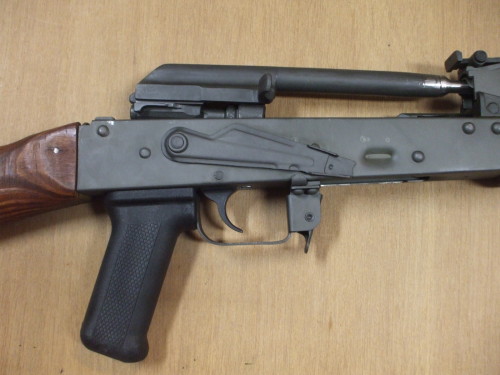
The bolt is the cylinder protruding to the rear out of the bottom of the bolt carrier in the view at right. You can see the safety lever and the hammer and hammer spring down in the receiver, with the open magazine well between the action and the bolt.
Pull the bolt carrier to the rear by its handle.
We need to get it all the way back, so it reaches the notches beyond the side rails at the rear of the receiver.
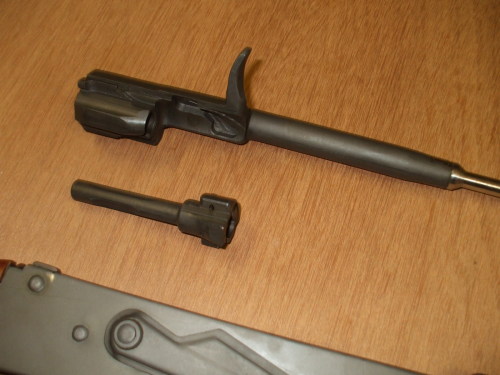
Pull the bolt carrier to the rear of the receiver. Then lift it and the bolt out of the receiver.
The gas piston will still be in the gas cylinder, limiting how far you can lift the bolt carrier.
Get bolt carrier off the side rails, and lift it just far enough to get the bolt out of the receiver. Then continue pulling the bolt carrier to the rear until the gas piston is out of the gas cylinder.
Push the bolt all the way back in the bolt carrier. Then rotate it so its lug clears the raceway on the bolt carrier. Now you can pull the bolt forward and remove it from the bolt carrier.
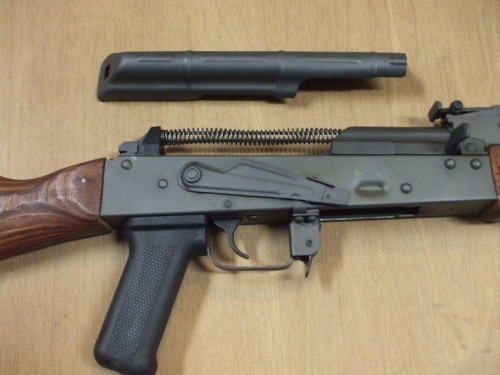
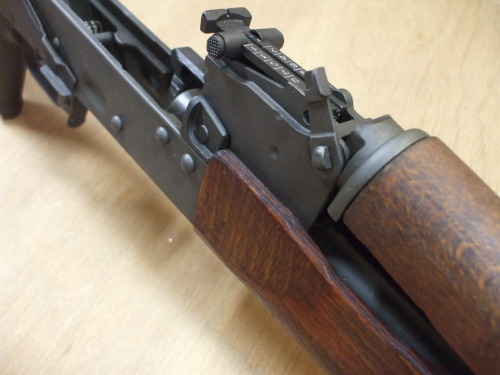
Notice the lever on the right side of the rear sight block. It will be rotated about 45° below horizontal.
This lever can be rotated upward to release the assembly of the upper handguard and gas piston.
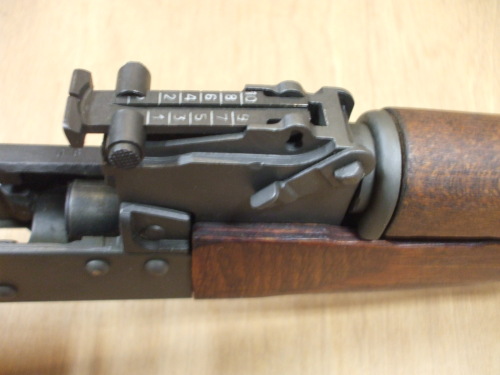
The handguard latch shaft is a half a cylinder. With the latch in this position, the rear of the gas cylinder is locked down.

As you rotate the lever, this half-cylinder rotates to allow the gas cylinder to move upward.

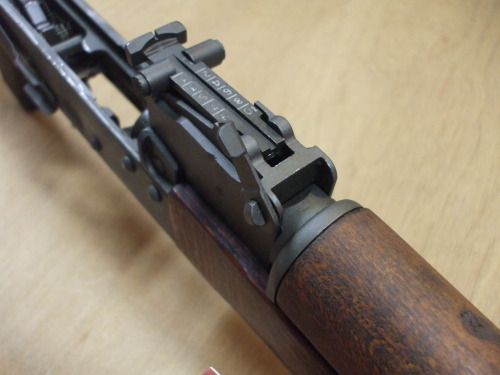
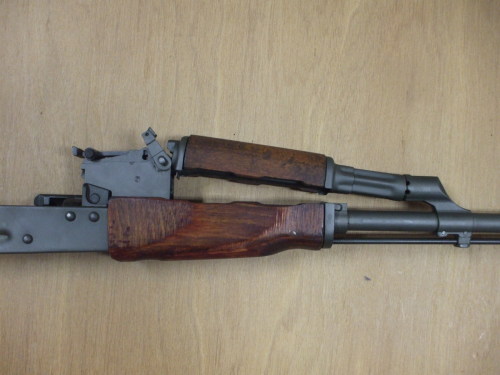
Now you can lift the rear handguard and gas cylinder away from the barrel.
The handguard simply rotates into place on the gas cylinder. If you need to remove the handguard, perhaps to refinish the wood, hold the forward part of the gas cylinder in one hand, the wooden handguard in your other hand, and rotate the handguard around the axis of the gas cylinder.
Finally, remove the cleaning rod by pulling its forward end away from the muzzle while unscrewing it.
The rifle is now ready for cleaning.
See the Section 922r compliance page for details on how to make certain that your surplus rifle is legal!